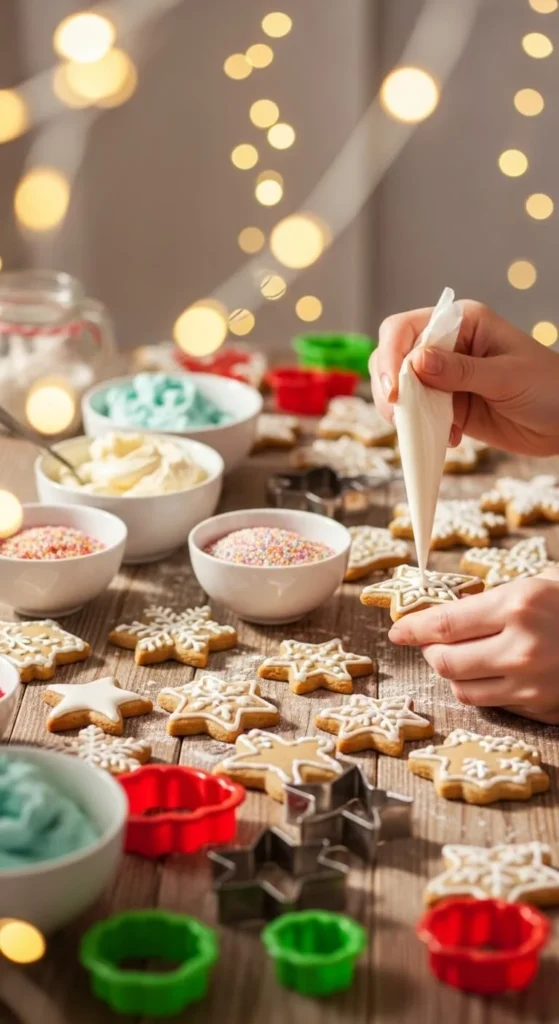
Creating Christmas cookies is already fun, but decorating them takes the joy even further. This list is all about simple, charming ideas you can recreate without fancy tools. Each style focuses on color, texture, and tiny touches that bring out warmth. Whether you’re baking with kids or prepping a holiday spread, these ideas help you craft cookies that feel personal and full of heart. Every tip keeps things easy, affordable, and beginner-friendly.
1. Soft Snowfall Icing Drip
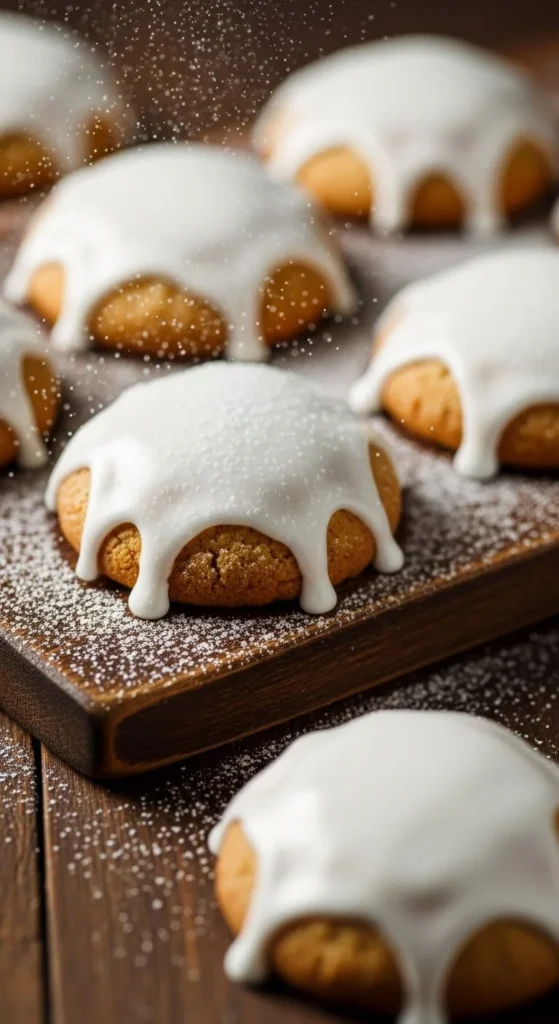
A light dusting of powdered sugar can transform a plain cookie into something soft and wintery. Keep your shapes simple—stars or circles work well. Let the cookies cool completely before adding the sugar, or it will melt. Use a mesh strainer for an even coat. Add tiny sugar pearls if you want a gentle sparkle without spending much. These cookies look lovely on platters, and the prep takes minutes. The style works great for gifting because it travels well. If you want a cleaner edge, brush off any extra sugar with a small pastry brush. Kids can help sprinkle the snow. Store them in a tin with parchment to keep the texture just right.
2. Heart-Shaped Holiday Icing

Heart shapes are perfect for adding a warm touch to your holiday trays. Use basic royal icing in red and white. Outline first, then flood the inside with thinner icing for a smooth surface. Create tiny dots or swirl patterns with a toothpick while the icing is still wet. You don’t need fancy piping bags—plastic sandwich bags with a snipped corner work fine. Add gold sprinkles if you want a gentle shimmer. Let them dry overnight before stacking. These cookies make sweet gifts, especially when wrapped in small cellophane bags tied with twine. Keep the designs simple for a clean look. A small batch of icing goes a long way, which keeps your budget in check.
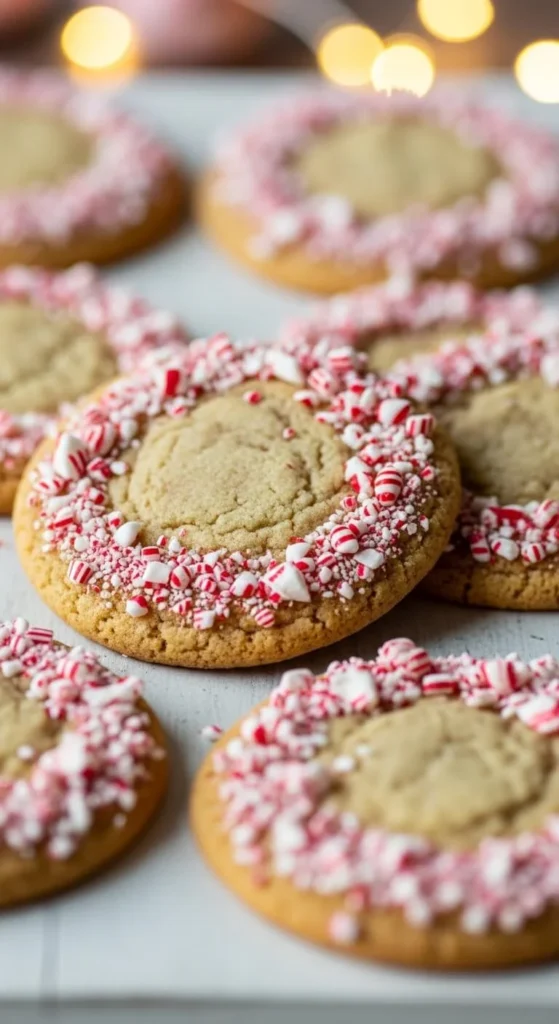
3. Peppermint Crunch Edges
Gingerbread cookies feel comforting during the holidays. You don’t need complicated designs to make them charming. A clean white outline brings out their warm brown color. Use a slightly thicker icing so the lines stay sharp. Try simple dots, curves, or tiny bows. This style works for any shape—people, trees, or stars. If you want to keep it affordable, skip the extra decorations and rely on the contrast alone. Let kids draw their own outlines for a fun activity. Allow the icing to dry fully before packing the cookies. Display them on a wooden board for a cozy look. These cookies pair nicely with hot drinks, making them great for gatherings.
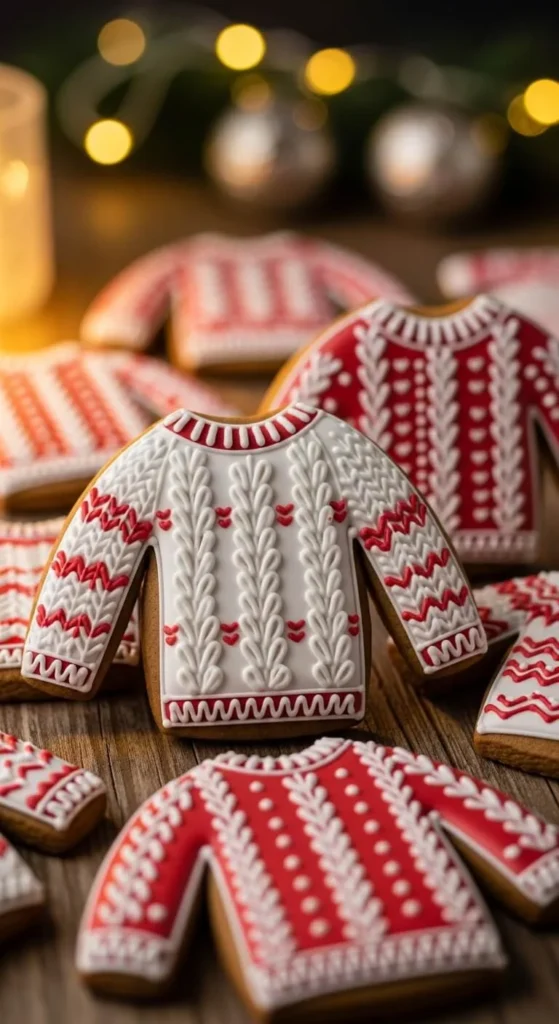
4. Cozy Sweater Texture Lines
Swirl designs add energy to your cookie tray. Use red gel coloring for bold lines on white icing. Draw a few lines from the center outward, then drag a toothpick between them to form a swirl. It takes seconds. Sprinkle crushed candy cane around the edges for texture. Buy a small box of candy canes—they’re inexpensive and cover a lot of cookies. If you want a softer flavor, skip the candy and keep the swirl clean. The style works well on circles and gives your cookies a classic holiday feel. Let the icing firm before adding them to plates so the colors don’t smear.
5. Frosted Forest Tree Tops

A chocolate dip instantly makes any cookie look polished. Melt a cup of chocolate chips with a bit of oil for shine. Dip half of each cookie and place it on parchment to set. Add crushed nuts, sprinkles, or coconut if you want variety. Use what you already have in your pantry to stay on budget. Shortbread and sugar cookies work especially well for dipping. Let them cool at room temperature for a smooth finish. This style is great for cookie boxes because it adds color and texture without a lot of work. Kids enjoy helping with the dipping, and the results always look festive.
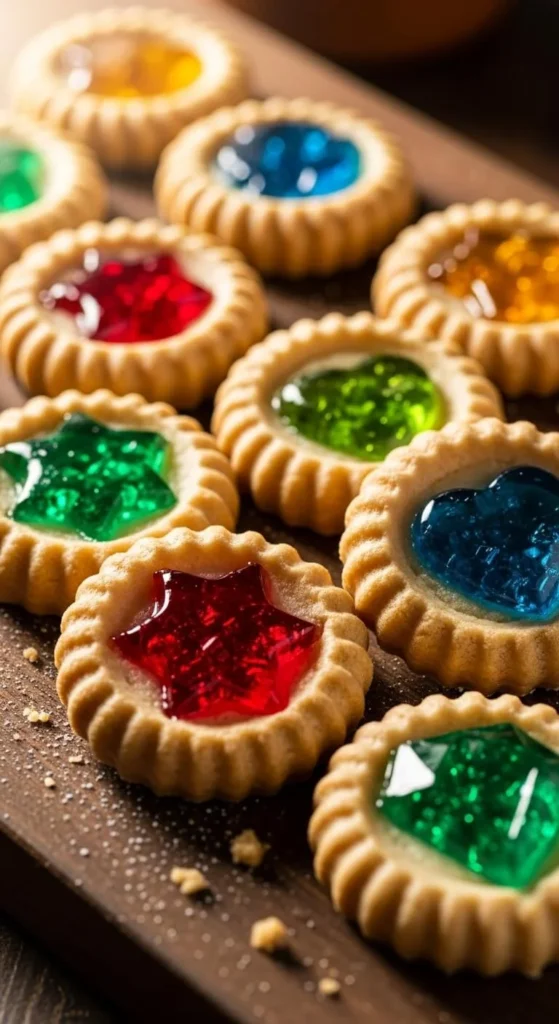
6. Simple Stained-Glass Centers
Add a pinch of cinnamon to your icing for a warm tint and subtle flavor. Spread it with a spoon instead of piping if you want a relaxed, homey look. Circles and stars look especially charming with this rustic style. Sprinkle a little cinnamon sugar on top while the icing is wet. The ingredients are inexpensive, and the style doesn’t require precision. Let the cookies dry on a wire rack so they don’t stick. These cookies look lovely bundled in bakery paper. Serve them with tea for a simple holiday treat.
7. Gingerbread Faces with Soft Expressions

Tree cookies are timeless and easy to customize. Tint your icing with green gel for a bright shade. Pipe the edges first, then fill the center. Add tiny candy stars or small sprinkles along the branches. If you don’t have star candies, cut small pieces from gummy candy. Keep the decorations light so they hold their shape. The cookies are budget-friendly and great for parties. Kids love decorating each tree differently. Let them dry completely before stacking. A little variety in the green shades adds charm.
8. Gold-Dusted Holiday Stars

Gold dust gives cookies a soft glow without much effort. Apply it with a dry brush after the icing sets. You only need a tiny amount, so one small container lasts a long time. Use it on simple shapes like stars or hearts. Keep the icing base white for a clean contrast. These cookies look elegant on platters and are great for gifting. If you want to stay under budget, skip expensive sprinkles and rely on the subtle shimmer. Store them carefully so the dust doesn’t rub off. This style works well for adults who enjoy a simple, stylish look.
9. Classic Red and Green Swirls
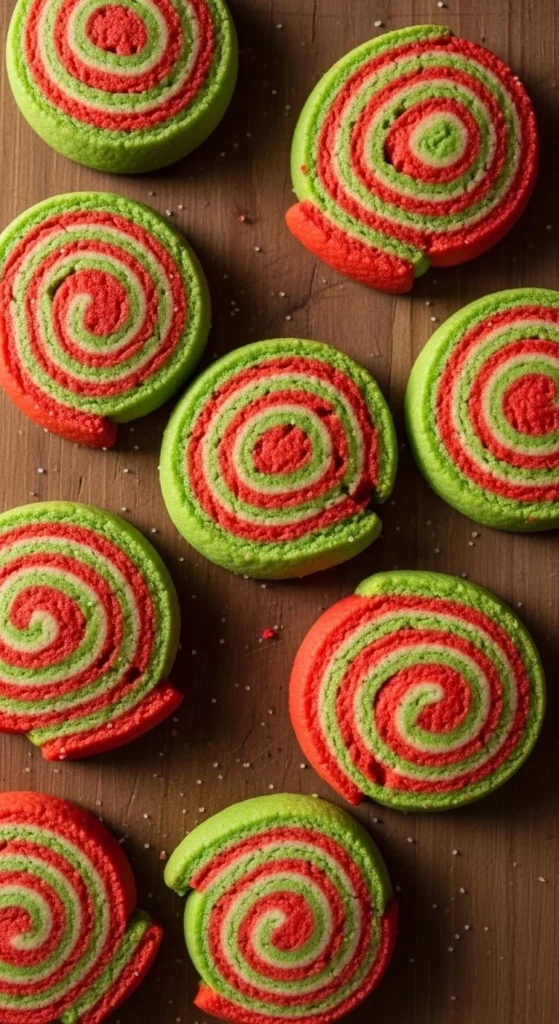
Red berry dots look cheerful and take very little time. Use thick red icing to pipe small dots in clusters. Keep the base icing white so the dots stand out. Add tiny green lines for leaves if you’d like. The supplies are minimal, making this a budget-friendly design. Circles or oval-shaped cookies work nicely. The style travels well if you’re bringing cookies to a gathering. Let the cookies dry overnight before stacking to prevent smudging. These cookies add a bright pop of color to any holiday tray.
10. Powdered Sugar Stencils
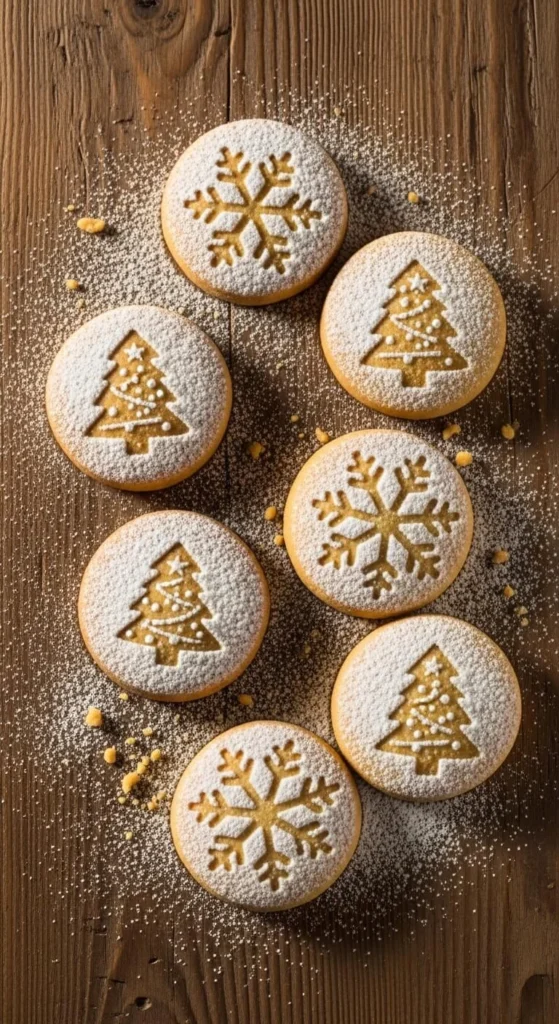
Use simple stencils to create crisp patterns with powdered sugar. You can make your own by cutting shapes from paper or reuse holiday craft stencils you already have. Place the stencil over the cookie and dust lightly. Lift carefully to reveal clean shapes. This method is fast and doesn’t require icing or sprinkles. It’s perfect for large batches when you want a clean, simple look. Kids enjoy holding the stencils while you dust. If you’re saving money, reuse the same stencil for all cookies. These look great on chocolate cookies because the white sugar stands out. Store them in tins with parchment between layers so the sugar stays intact. Add more patterns as you go to mix up the designs.
11. Candy Button Stripes
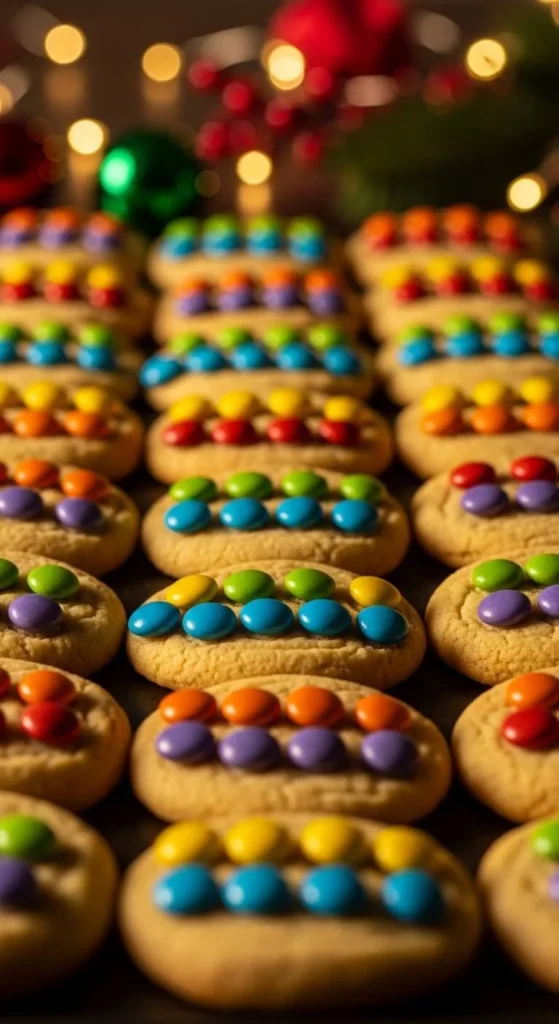
Add colorful stripes using small candies. Press them into the dough right before baking. Choose one or two colors to keep the cookies simple and neat. This method works well when decorating with kids because they can line them up however they like. It’s also cost-friendly since a single bag of candy lasts long. For a neater finish, press the candies gently so they stay level during baking. These cookies look cheerful on holiday platters. If you want softer colors, pick pastel candies instead of bright ones. Arrange the cookies in rows so the stripes repeat across the tray. This design works on any cookie flavor, from sugar to chocolate chip.
12. Rustic Woodgrain Icing
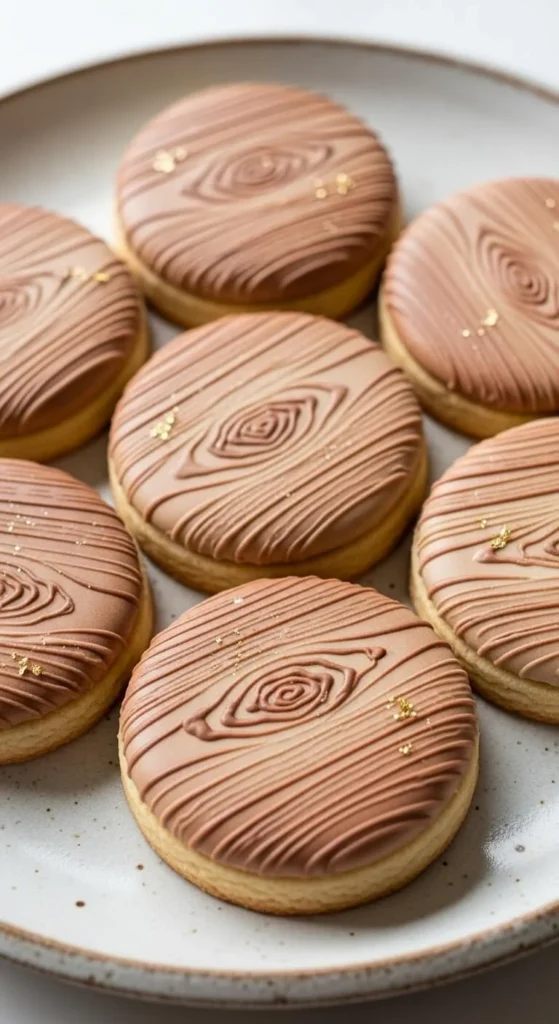
Woodgrain cookies add a rustic feel to holiday spreads. Mix brown and beige icing together with gentle strokes to create a simple pattern. You don’t need special tools—just drag a toothpick lightly through the icing. Keep the strokes long and soft. This idea works especially well for woodland or cabin-themed parties. If you’re saving money, stick to one shade and vary the pressure to change the pattern. Kids enjoy creating the lines because the pattern doesn’t need to be precise. These cookies look good wrapped in twine for gifting. Keep the icing thin enough to blend easily. Pair them with green or red cookies for contrast. Store them on parchment paper so the design stays clean.
13. Soft Pastel Frosting Spread
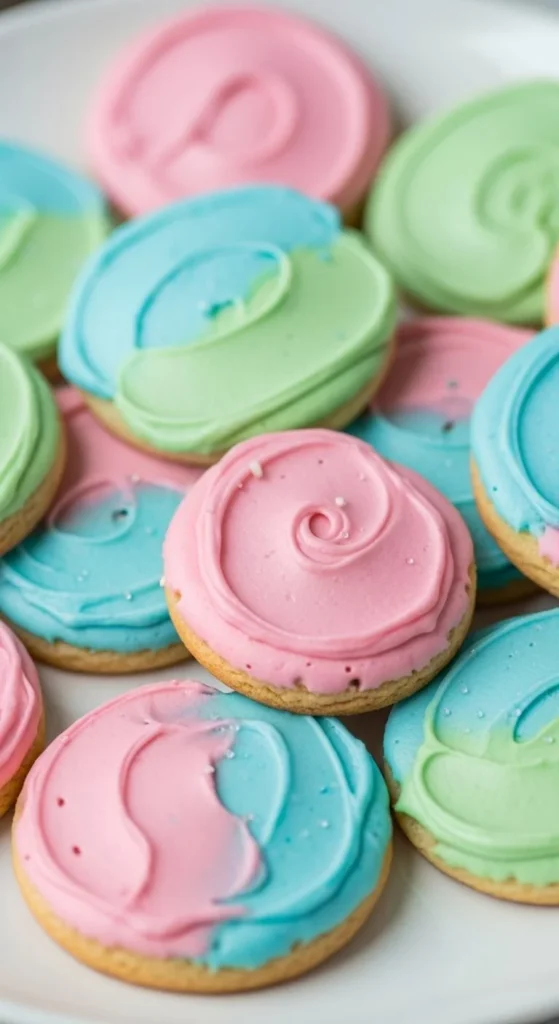
Pastel icing offers a gentle holiday look. Mix small amounts of food coloring into white frosting to get soft tones. Spread with a knife or spatula rather than piping. This method saves time and money because you don’t need multiple tools. Pastel cookies look great in gift boxes and pair well with bright holiday designs. Kids love choosing the colors. For extra charm, add small white dots or tiny sugar pearls. Keep the frosting thick so it spreads smoothly. These cookies stack nicely once the icing sets. Use simple shapes like circles or stars to keep the design relaxed. This style fits well into winter brunches or cookie exchanges.
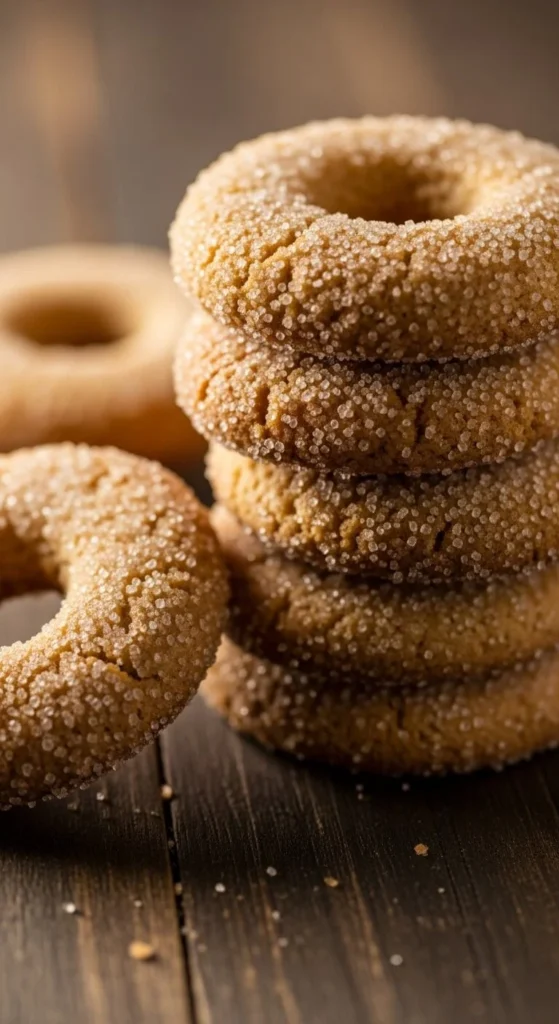
14. Cinnamon Sugar Sparkle
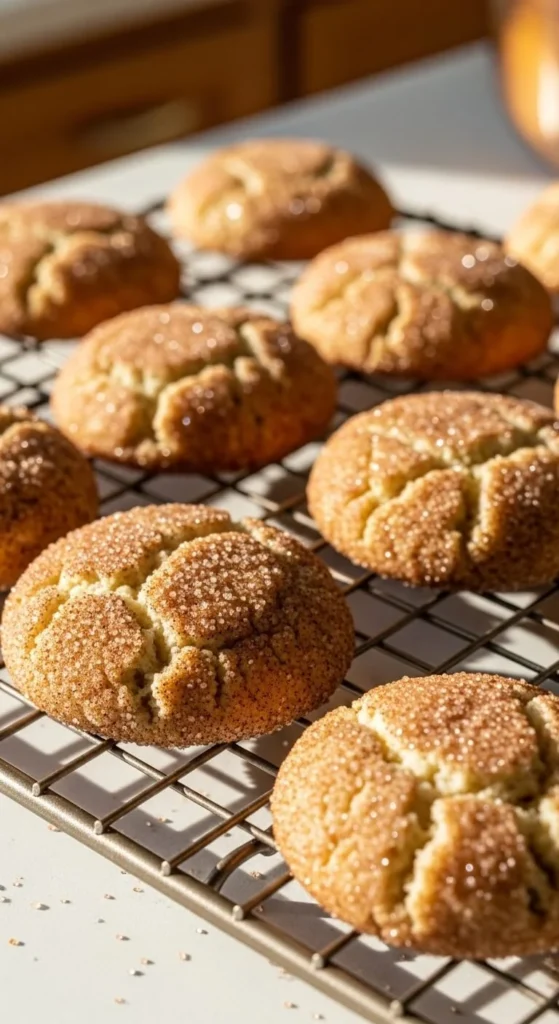
A mix of cinnamon and sugar gives cookies a warm sparkle without icing. Roll the dough balls in the mixture before baking. This recipe is inexpensive since it uses pantry staples. The cookies come out golden with a slightly crisp coating. Kids enjoy rolling them because the texture feels soft and grainy. These cookies pair well with spiced tea or hot cider. If you want extra shine, sprinkle a little more sugar on top right after baking. Use this method for snickerdoodles or soft sugar cookies. They store well and stay flavorful for days. Display them in a rustic bowl for a cozy holiday look.
15. Mini Chocolate Drizzle Webs
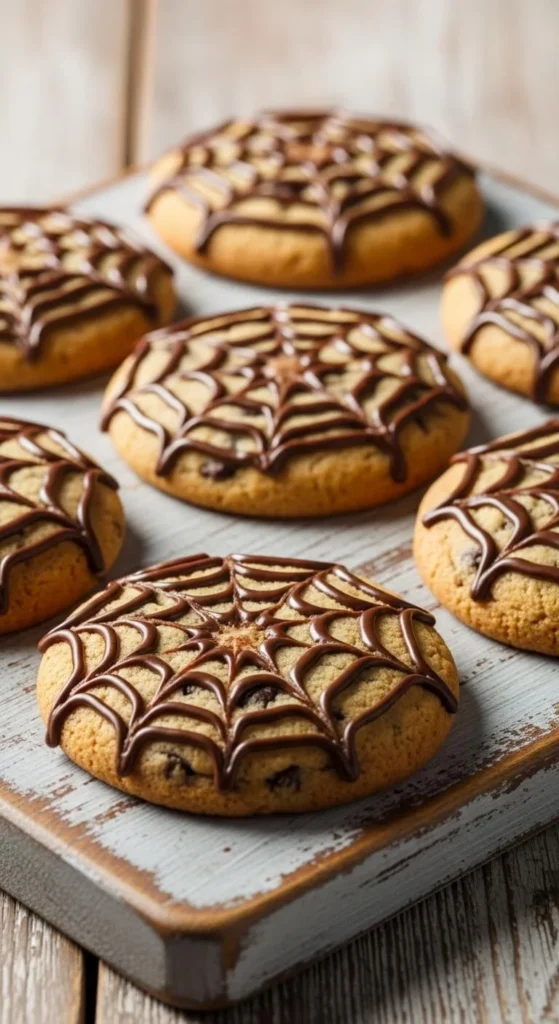
Drizzling chocolate adds charm without effort. Melt chocolate chips in a microwave-safe bowl, then use a spoon to flick thin lines across each cookie. Keep the drizzle light so the pattern stays delicate. This method is budget-friendly and quick. Kids enjoy helping as long as the chocolate cools slightly. You can use white, dark, or milk chocolate depending on what you have. These cookies look great next to plain iced cookies for contrast. If you want thicker lines, use a piping bag made from a small plastic sandwich bag. Let the chocolate set fully before stacking the cookies. Pair them with peppermint cookies for a mixed holiday tray.
16. Warm Holly Berry Clusters

Add simple holly clusters using small dabs of icing and tiny red candy pieces. Make two small green leaves with gentle strokes, then place three red candies in the center. This gives each cookie a classic holiday look. The design works well even if you aren’t confident with piping. Kids can add the berries while you pipe the leaves. If you want to keep costs low, use mini red chocolate candies or colored sugar pearls. These cookies look lovely in tins or arranged on plates with green napkins. Keep the icing thick so the leaves hold their shape. This design works on round, square, or star-shaped cookies.
17. Marshmallow Snow Caps
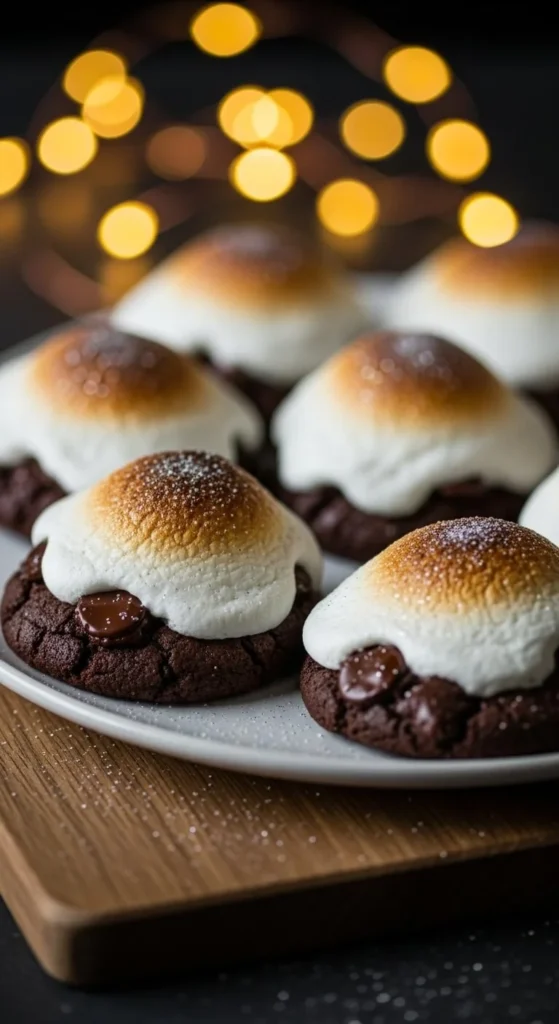
Melted marshmallows create soft, snowy tops for cookies. Place a small marshmallow on each cookie during the last minute of baking so it softens slightly. Press gently with a spoon once removed from the oven. The marshmallow spreads enough to form a snow cap. This method is inexpensive and fun. Kids enjoy watching the marshmallows melt. You can add a thin drizzle of chocolate over the top once they cool. These cookies taste great warm and pair well with hot cocoa. Use parchment so the marshmallow doesn’t stick. If you want different looks, cut marshmallows in half for smaller caps. They stay soft even the next day.
18. Spiced Orange Icing
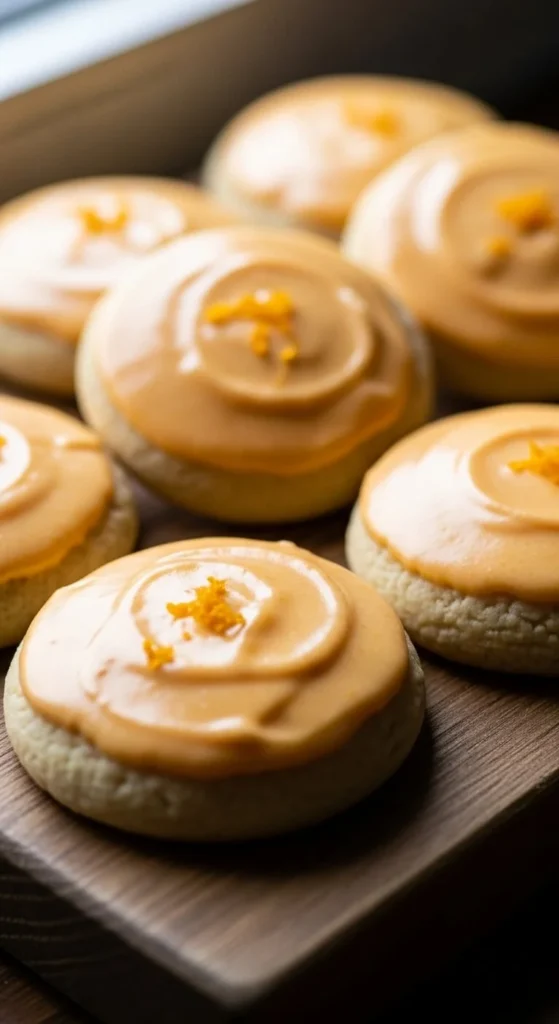
A little orange zest mixed into icing gives cookies a warm aroma. Add a few drops of orange coloring to create a soft tint. Spread the icing with a spoon for an easy, handmade look. This method uses simple ingredients and stays affordable. Kids enjoy sprinkling extra zest on top for pops of color. These cookies pair nicely with chocolate or gingerbread. Keep the icing thin enough to flow lightly. Arrange them next to white cookies for a bright holiday tray. Store them in airtight containers so the zest stays fragrant. The added citrus brings a calm, cozy vibe to holiday baking.
19. Mini Ornament Cookies

Turn small cookies into tiny ornaments using simple patterns. Add dots, stripes, or small candy pieces to mimic classic ornament styles. Use one or two icing colors to keep things simple and affordable. Kids love decorating these because each cookie becomes its own design. You can create a whole tray of little ornaments without much time. For a neat look, use a small piping tip. Let the icing dry before stacking. These cookies work well for holiday parties and make cute gifts. Mix shapes and colors but keep the designs small so the cookies stay light and easy to display.
20. Sugared Cranberry Accents
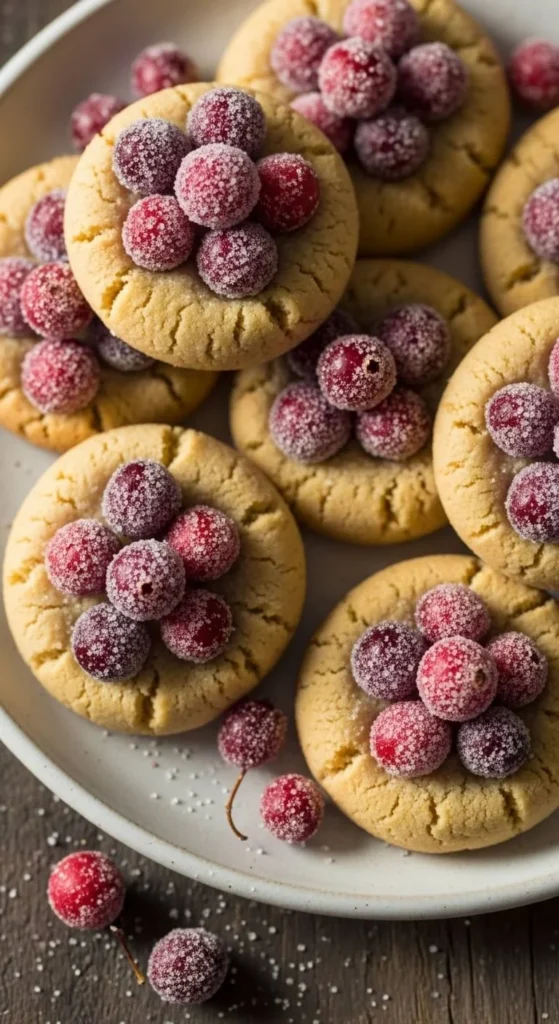
Sugared cranberries add color and texture with almost no effort. Dip fresh cranberries in simple syrup, then roll in sugar. Once dry, place them on cookies with a dab of icing. This idea stays budget-friendly and adds a festive pop. Kids enjoy rolling the berries in sugar. The cranberries hold their sparkle even after a day. Use them on plain frosted cookies for a bright contrast. These cookies look great on holiday dessert boards. Store them in a cool spot so the cranberries stay firm. Add a small mint leaf for an extra touch if you want.
21. Frosted Ribbon Loops
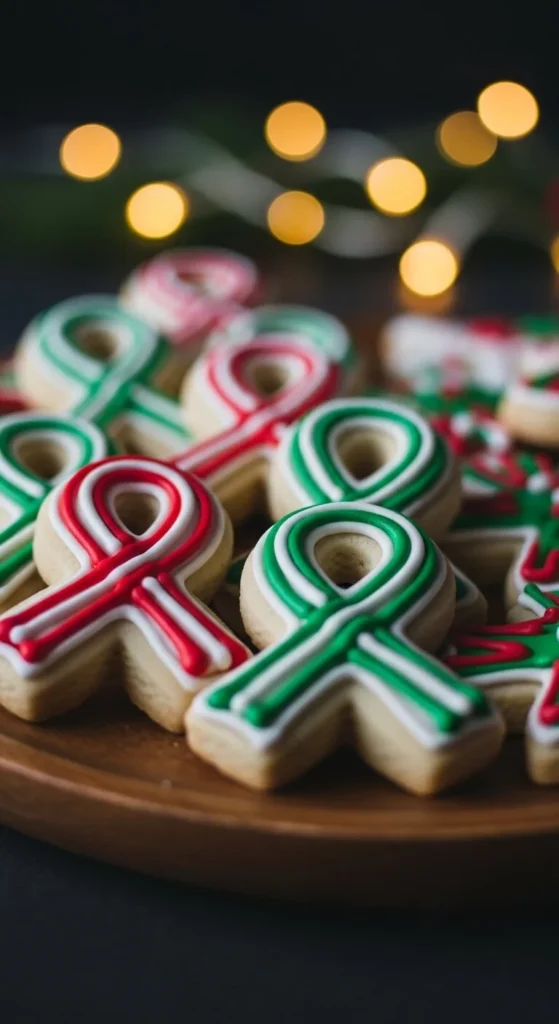
Use icing to create simple ribbon loops. Pipe curved lines that look like folded ribbon pieces. You don’t need multiple colors; even one shade looks charming. Keep the icing thick so the loops hold shape. Kids enjoy helping since the loops don’t need to be perfect. These cookies look festive in gift boxes. If you’re on a budget, skip extra detailing and focus on the loops. Pair them with plain cookies for variety. Let the icing dry fully before stacking. This style creates soft, seasonal charm without hours of decorating time.
22. Winter Night Sky Speckles
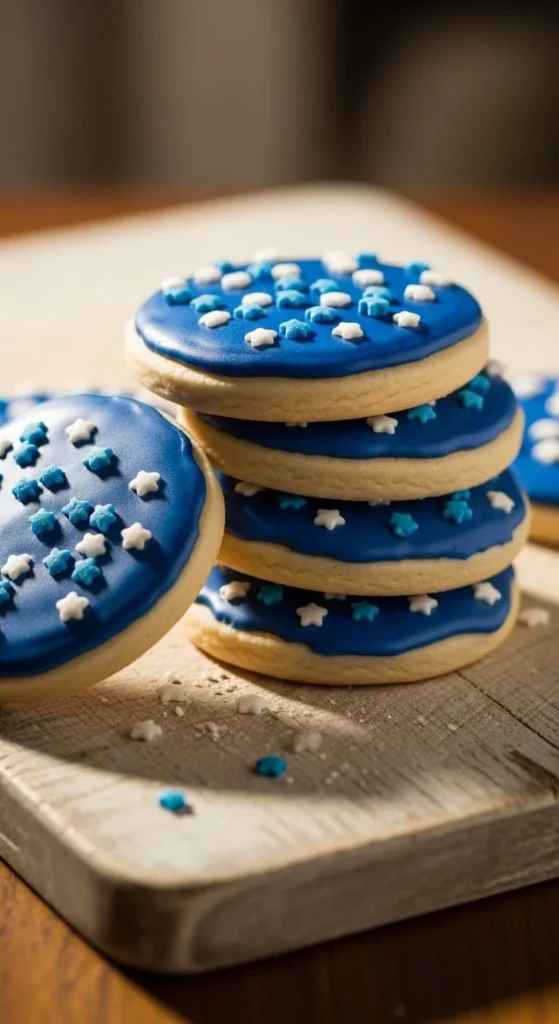
Create a night-sky look with dark icing and a sprinkle of white sugar. Spread blue icing over your cookies, then flick tiny dots of white icing or sugar on top. This creates a simple star-like effect. It’s easy and uses inexpensive ingredients. Kids enjoy making the dots. These cookies pair well with snowflake designs. Keep the icing thin enough to spread smooth. If you’re saving money, use cocoa powder mixed with blue coloring to darken the shade without extra dyes. Store them flat until the icing sets so the speckles stay crisp. These cookies look lovely next to candlelight displays.
23. Soft Mint Swirl Frosting
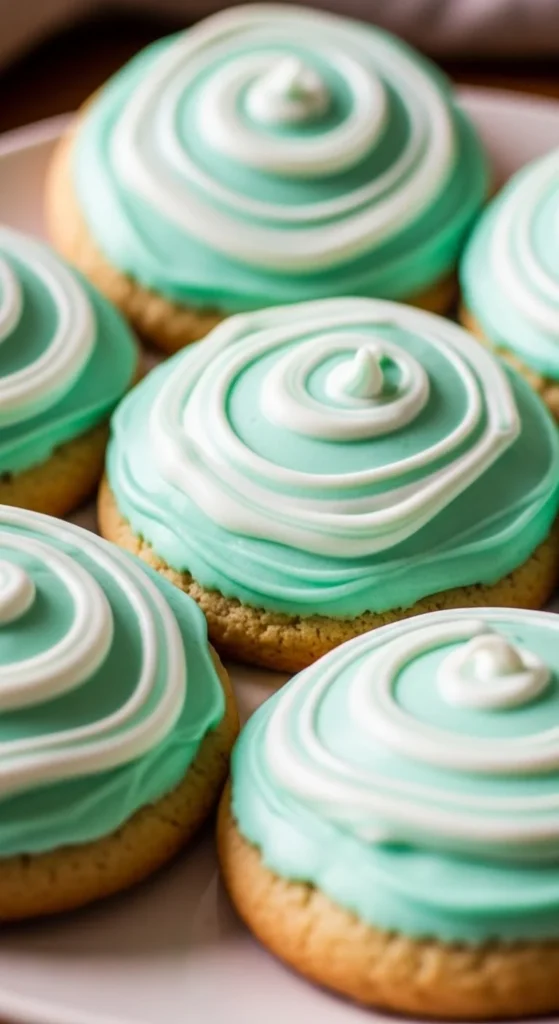
Mint frosting adds a cool holiday touch. Mix a drop of mint extract with pale green icing. Swirl white icing lightly through it for a soft pattern. Spread with a spoon for an easy finish. This idea stays affordable because you only need small amounts of extract and color. Kids enjoy swirling the patterns. These cookies pair well with chocolate treats. Keep the icing fluffy for a smooth look. Arrange them with darker cookies for contrast. Store in cool containers so the mint stays fragrant.
24. Cherry Jam Windows
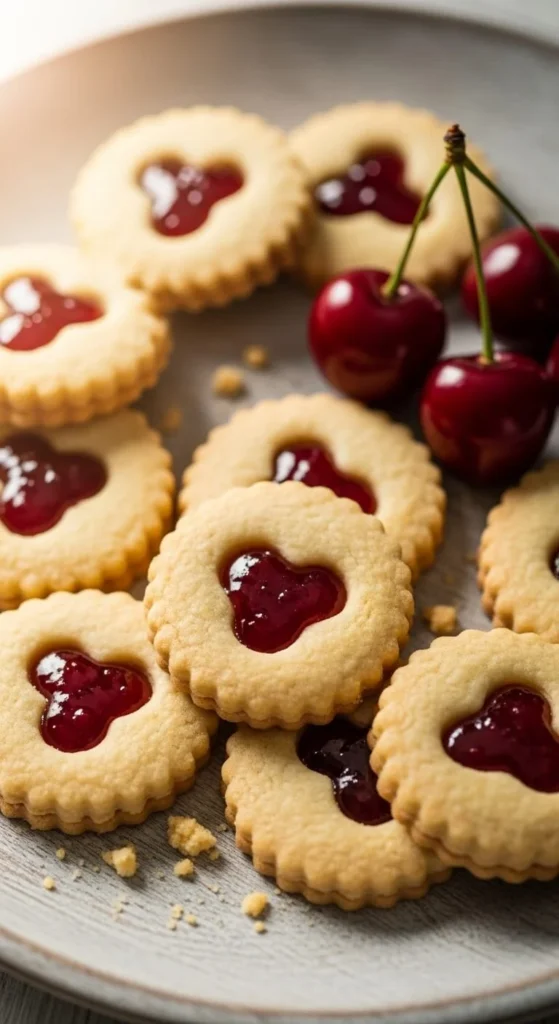
Fill small cut-out shapes with cherry jam before baking. The jam settles into a shiny center that looks bright and warm. This method uses simple ingredients and stays low cost. Kids enjoy spooning the jam into the cookies. Choose shapes like hearts or circles for clean results. These cookies look lovely stacked or displayed on trays. Keep the dough thick so the jam stays in place. Let the cookies cool fully so the jam sets firm. They pair nicely with powdered sugar cookies.
25. Sparkling Sugar Edges
Rolling cookie edges in coarse sugar gives them a subtle shine. Use any color you like, though white or gold works well for holiday baking. Dip the edges briefly in water or thin icing, then roll in sugar. This method is fast and budget-friendly. Kids enjoy rolling the cookies. These cookies look great with simple icing or even plain. Display them on a dark plate so the sugar sparkles. Store them in airtight boxes so the sugar stays crisp. They pair well with tea or coffee.
Conclusion
Christmas cookie decorating doesn’t need to feel complicated or expensive. With simple icing, basic tools, and a few fun add-ons, you can create treats that feel warm and personal. Pick the ideas that fit your time and style. Try one technique or mix several for a full holiday spread. Each design brings charm to gatherings, gifts, and cozy nights at home. Enjoy the process, share the cookies, and make the season feel extra sweet.
Leave a Reply