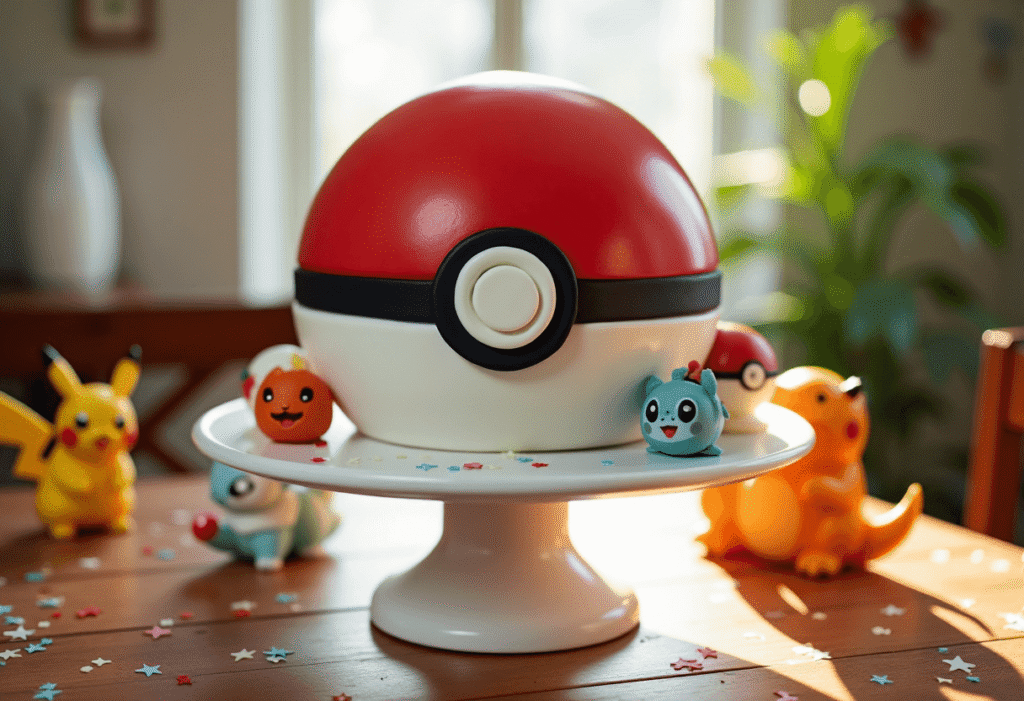
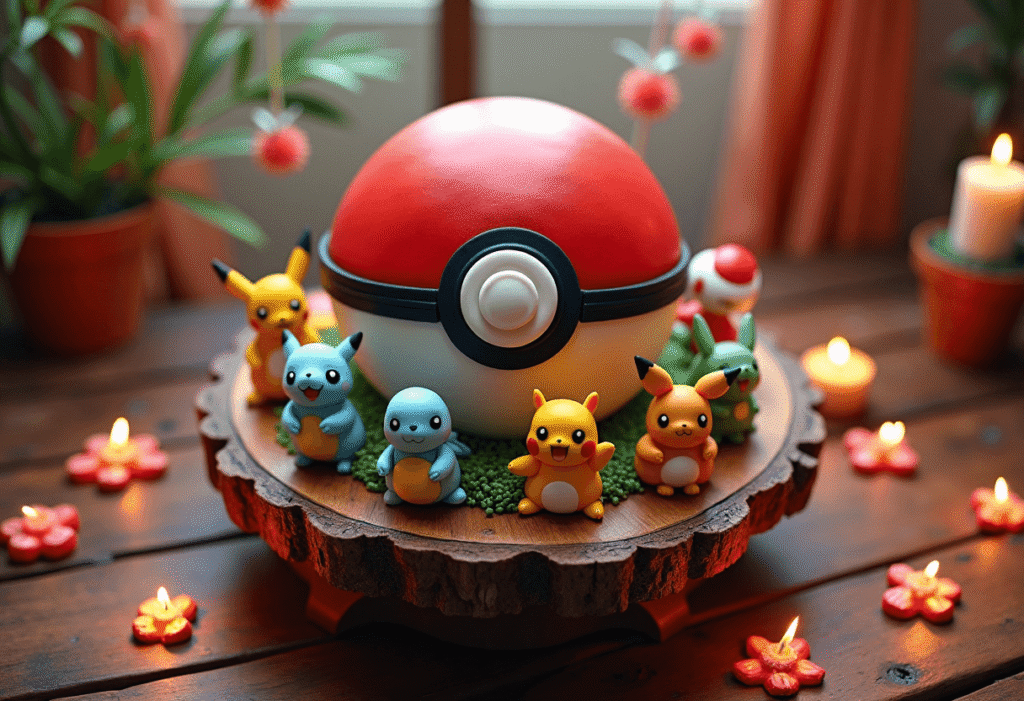
This cake is made with two half-sphere cakes sandwiched together, filled with buttercream or your favorite frosting, and decorated to look just like a real Pokéball. You can keep it classic on the inside (vanilla, chocolate, red velvet) or even use red and white layers for a color surprise!
🛒 What You’ll Need
For the Cake:
- 2 cake recipes or mixes (your choice: vanilla, chocolate, red velvet, etc.)
- Butter or oil, eggs, and milk/water (as required for cake mix)
- 1 cup buttercream or whipped frosting (for filling and crumb coat)
For the Decoration:
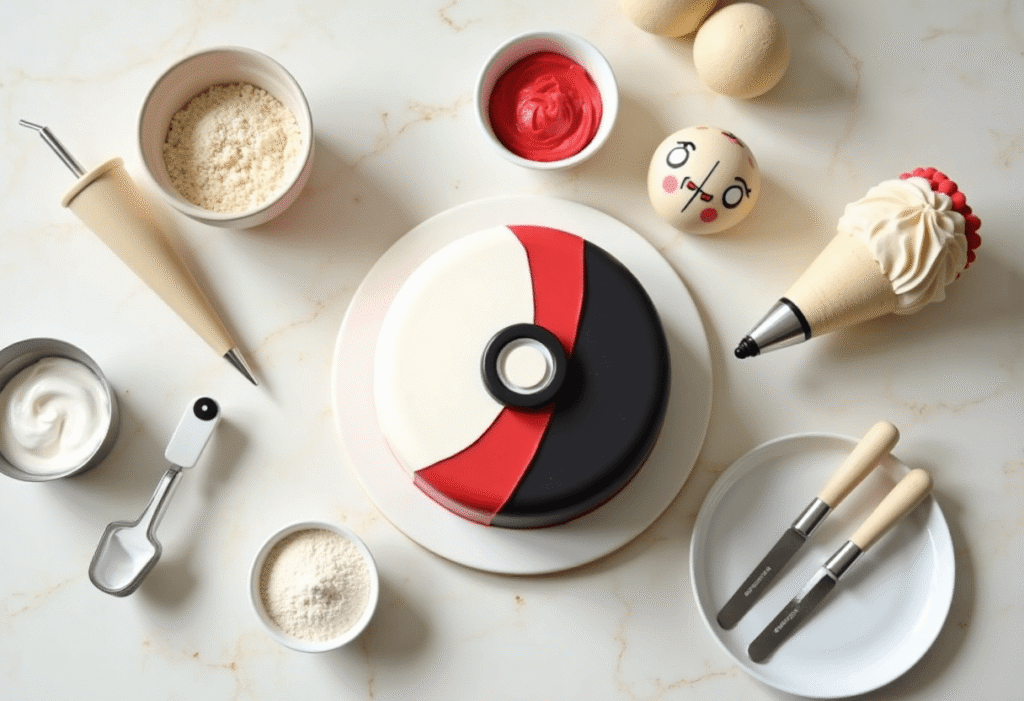
- Red fondant
- White fondant
- Black fondant
- Small circle cookie cutter or piping tip (for Pokéball button)
- Optional: edible glue or a dab of water for sticking fondant
👩🍳 Pro Tips
- Use spherical or dome pans (like a sports ball cake pan) for a perfect Pokéball shape.
- Freeze the cake layers before assembling to make carving and decorating easier.
- Smooth fondant with your hands or a fondant smoother for a clean, professional finish.
- Use toothpicks or skewers inside to stabilize if stacking is tricky.
- Add sparkle: Use edible shimmer dust or glitter on the red half for an epic finish!
🧰 Tools You’ll Need
- 2 dome cake pans (or use a large mixing bowl)
- Cooling rack
- Serrated knife
- Offset spatula
- Fondant rolling pin
- Piping bags
- Small round cutter or knife for details
🔄 Substitutions & Variations
- Buttercream instead of fondant: Color your buttercream and pipe the design instead.
- Mini version: Use cupcake-sized domes for individual Pokéball treats.
- Chocolate lovers: Use chocolate ganache instead of frosting under the fondant.
- Color surprise: Tint the inside cake red and white to match the Pokéball when sliced.
⏱️ Make Ahead Tips
- Bake and freeze cake domes up to 1 week ahead (wrap tightly in plastic wrap).
- Fondant decorations can be made 2–3 days in advance and stored in a cool, dry place.
- Assemble and decorate cake 1 day before serving for best results.
👩🍳 Instructions
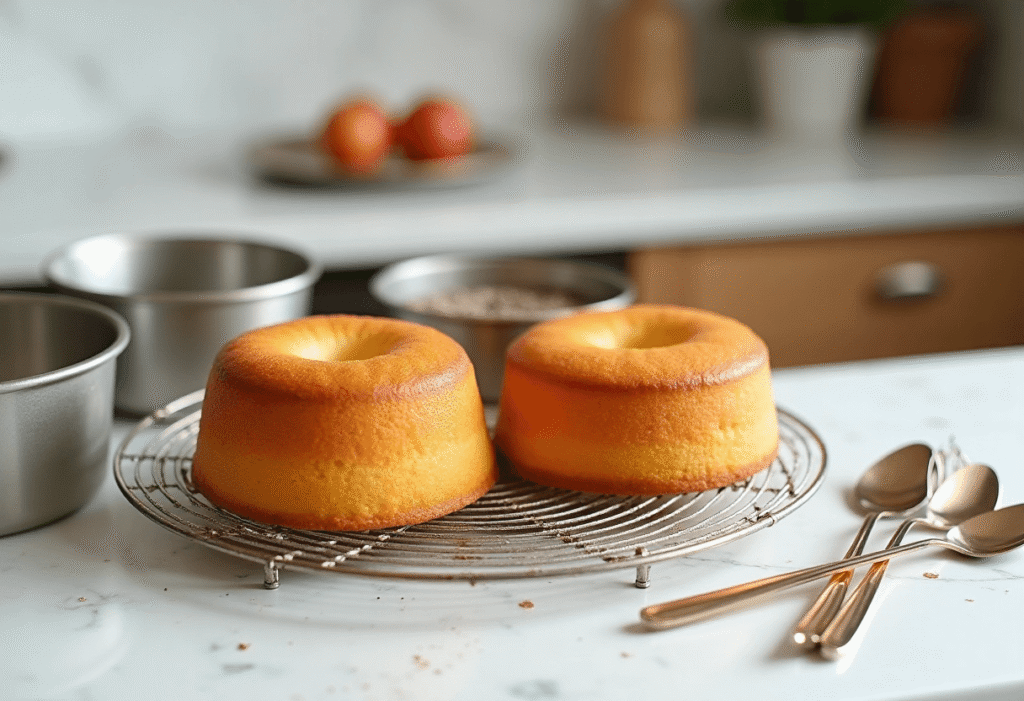
1. Bake the Cake
Prepare cake batter according to recipe or box directions. Bake in two dome cake pans (or oven-safe bowls) until a toothpick comes out clean. Cool completely.
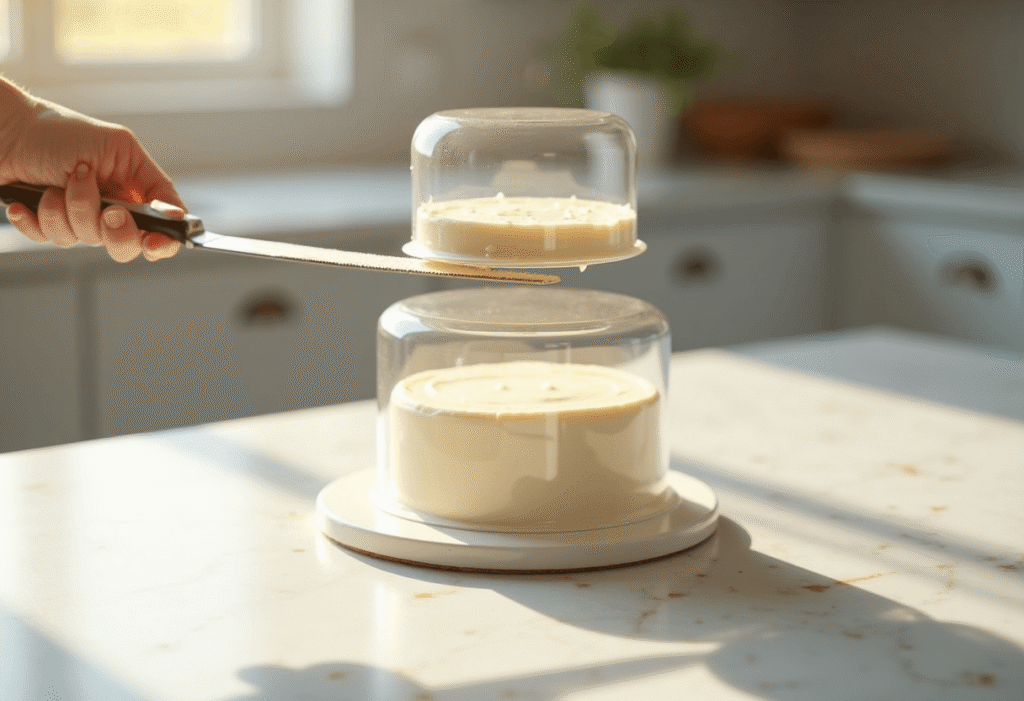
2. Trim & Fill
Level the flat side of each dome using a serrated knife. Spread buttercream on one dome and sandwich the other on top to form a ball.
3. Crumb Coat
Apply a thin layer of buttercream over the whole cake to trap crumbs. Chill in fridge for 30 minutes to set.
4. Cover with Fondant
Roll out red fondant and cover the top half of the cake. Roll out white fondant and cover the bottom half. Use a strip of black fondant around the middle for the Pokéball stripe and a small white circle for the button.

5. Decorate & Serve
Smooth the fondant, touch up any seams, and chill until ready to serve. Optional: place Pokémon toys or figures around for extra fun!
🧊 Leftovers & Storage
- Store covered at room temp for 2 days or refrigerate for up to 5 days.
- Bring to room temperature before serving for best texture.
- Fondant cakes do not freeze well once decorated—freeze plain cake layers instead.
💬 Final Thoughts
This Pokéball Cake is a guaranteed hit with kids and Pokémon fans of all ages! It’s bold, creative, and surprisingly simple once you break it into steps. Whether you keep it classic or surprise guests with colorful layers inside, this cake is sure to level up your celebration.
Leave a Reply