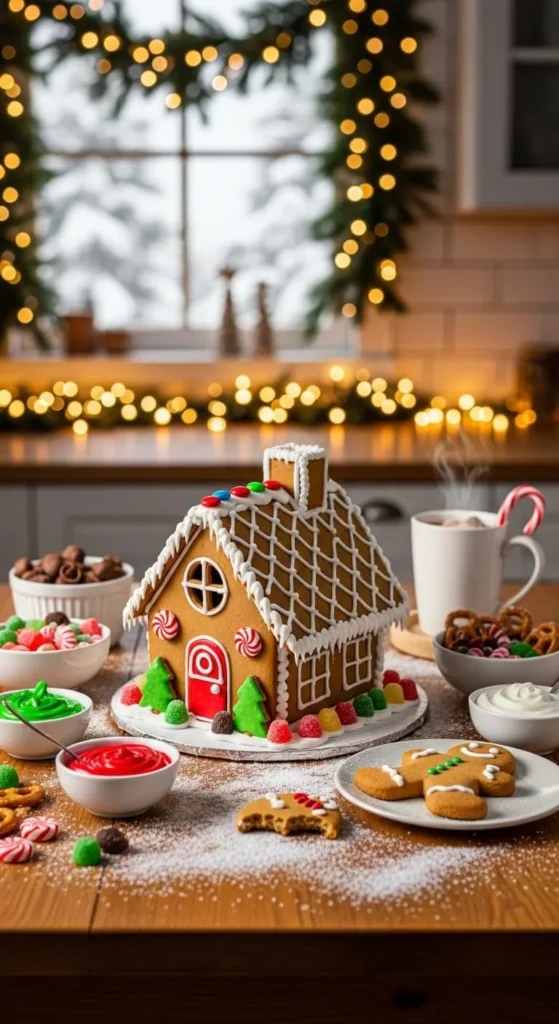
Building a gingerbread house sounds magical—until the walls start sliding, the roof collapses, and suddenly it’s more snack than structure 😅
The good news? A gingerbread house that actually stays together isn’t about luck or fancy tools. It’s about the right dough, strong “edible glue,” and smart assembly.
With this step-by-step guide, you’ll build a sturdy, picture-perfect gingerbread house that survives decorating day and looks amazing on display.
Start With a Strong Gingerbread Dough
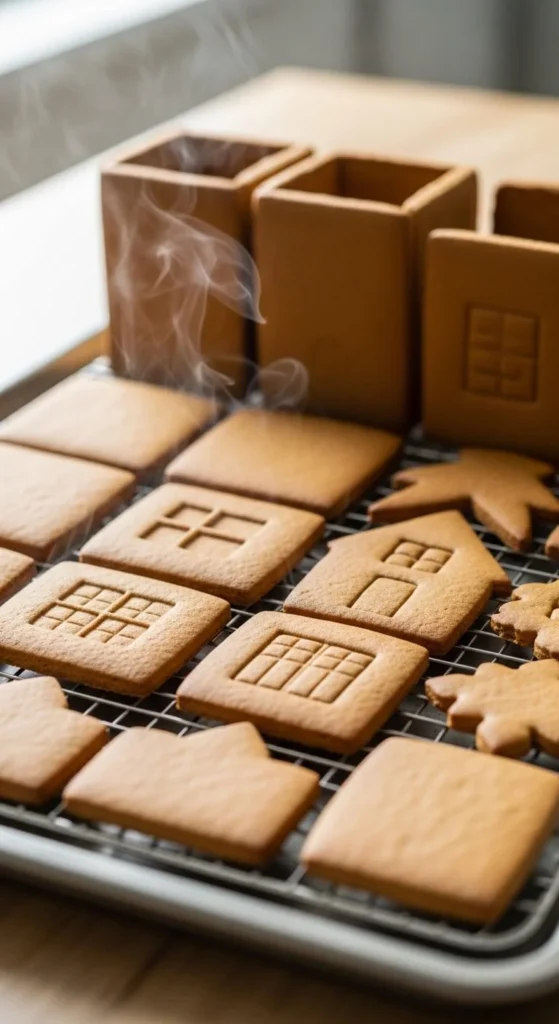
The foundation of a sturdy gingerbread house is the dough itself. Soft, cakey gingerbread is delicious—but it won’t hold walls upright.
What makes good structural gingerbread?
- Firm, low-rise dough
- Minimal leavening (no fluffy lift)
- Crisp edges that bake flat
Key tips:
- Roll dough evenly (about ¼ inch thick)
- Chill dough before cutting shapes
- Avoid adding extra butter or liquid
Once baked and cooled, the pieces should feel solid—not bendy.
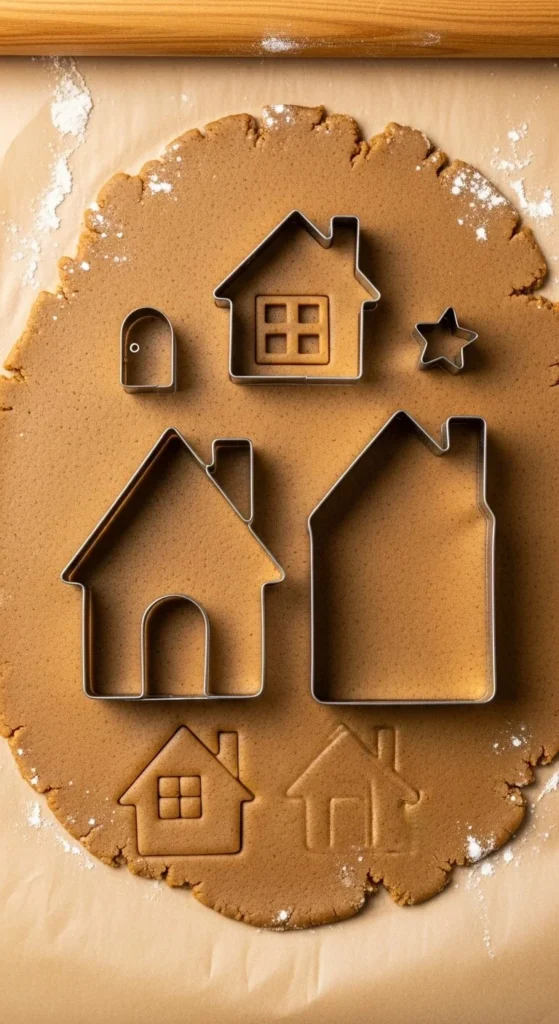
Cut and Bake Clean, Precise Pieces
Crooked walls = leaning house. Precision matters more than decoration at this stage.
For best results:
- Use a printed or reusable gingerbread house template
- Cut pieces with a sharp knife
- Bake on flat, heavy baking sheets
- Let pieces cool completely before moving
If edges spread slightly during baking, trim them with a serrated knife while they’re still warm. Straight edges mean tight seams later.
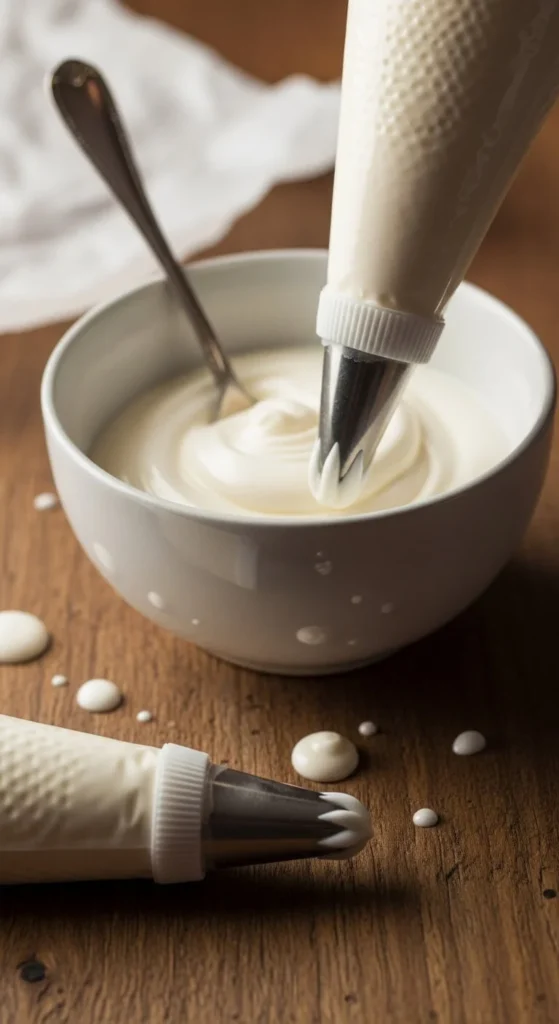
Make Royal Icing That Works Like Edible Cement
This is the real secret to a gingerbread house that stays together.
Royal icing dries hard, making it perfect for construction.
Simple royal icing formula:
- Powdered sugar
- Egg whites or meringue powder
- A few drops of water
You want a thick, pipeable consistency—it should hold stiff peaks and not drip.
Pro tip:
If it slides or spreads, it’s too thin. Add more powdered sugar until it’s glue-thick.
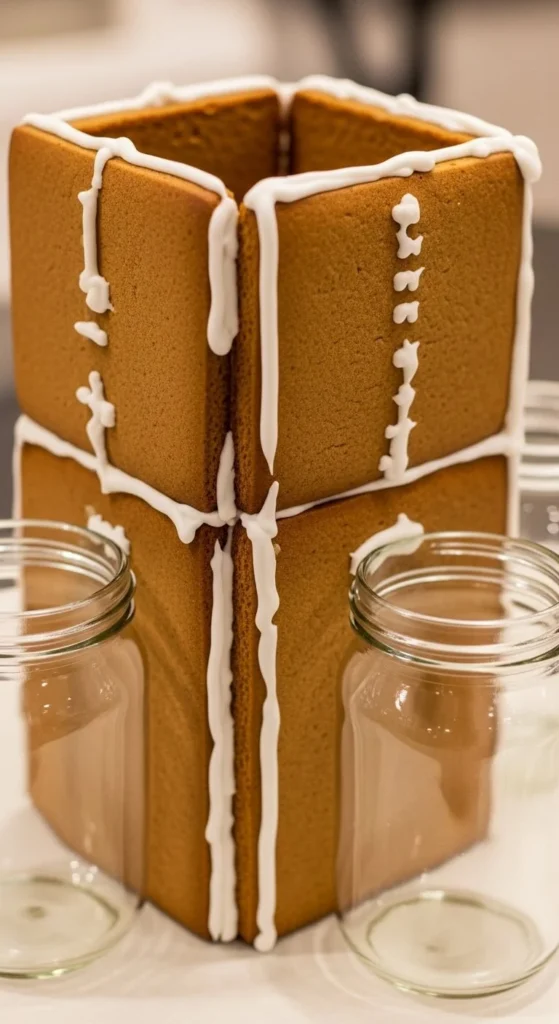
Assemble in Stages (Patience Pays Off)
Trying to build everything at once is the fastest way to end up frustrated. Think of assembly like building a house in real life—one step at a time.
Step-by-step assembly:
- Pipe icing onto the base edges
- Attach two walls and let them set (10–15 minutes)
- Add remaining walls
- Let the structure dry completely before adding the roof
Use small jars, mugs, or cans to support walls while the icing hardens.
Add the Roof Last—and Let It Set
Roofs are heavy, and gravity is not your friend here.
Roof success tips:
- Pipe icing generously along wall tops
- Attach one roof panel at a time
- Let the first side dry before adding the second
If needed, hold the roof in place gently for a minute or use supports until it sets.
Once the roof is on, pause. Let everything dry before decorating.
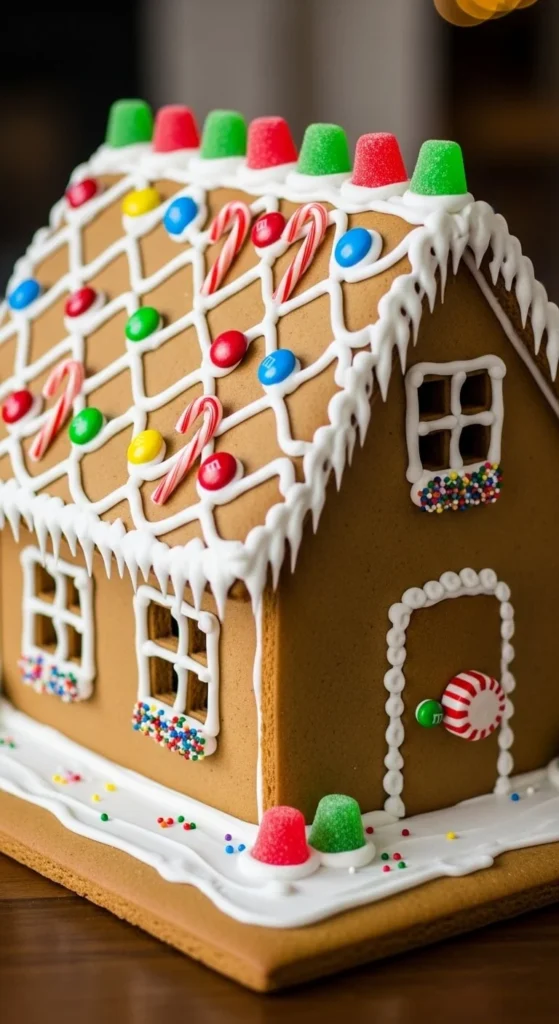
Decorate Without Compromising Structure
Now for the fun part 🎉
Decorating is where many houses collapse—mainly because of weight.
Smart decorating rules:
- Add decorations after the structure is fully dry
- Use icing as glue, not just decoration
- Start with lighter candies, then heavier ones
Great sturdy decoration ideas:
- Gumdrops
- Candy canes (cut into small pieces)
- Chocolate buttons
- Icing details like snow, windows, and trim
Extra Tips for a Stress-Free Build
- Build on a sturdy base like cardboard or a wooden board
- Work in a cool, dry room (humidity weakens icing)
- If something cracks, use extra icing—it hides mistakes beautifully
- Small houses are easier and sturdier than oversized ones
Remember: perfection isn’t the goal. Stability is.
Final Takeaway
A gingerbread house that stays together isn’t about being an expert baker—it’s about strong dough, thick royal icing, and patience during assembly. Follow these steps, and you’ll end up with a festive centerpiece that looks amazing and holds up proudly.
✨ Save this guide for your next holiday bake—and enjoy building without the collapse drama!
Leave a Reply