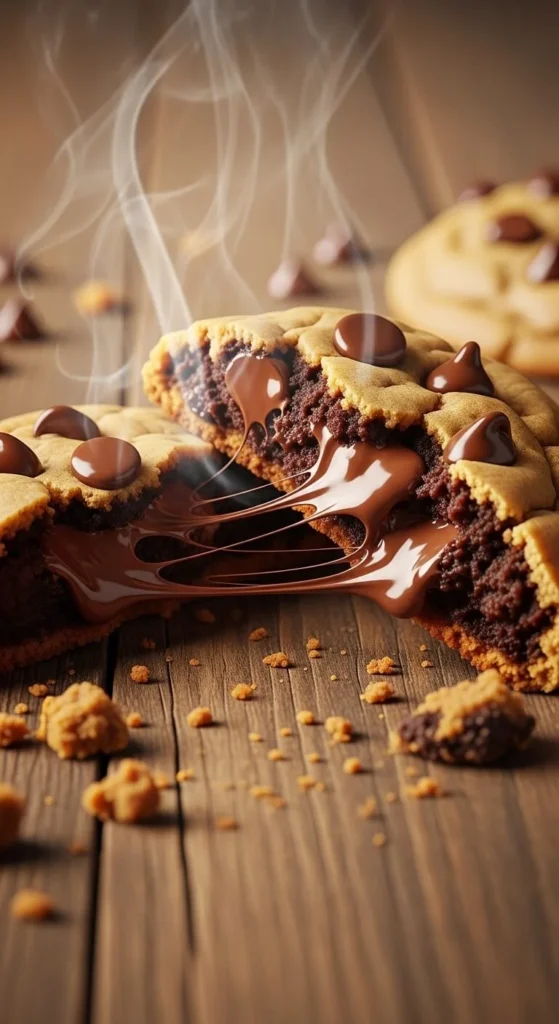
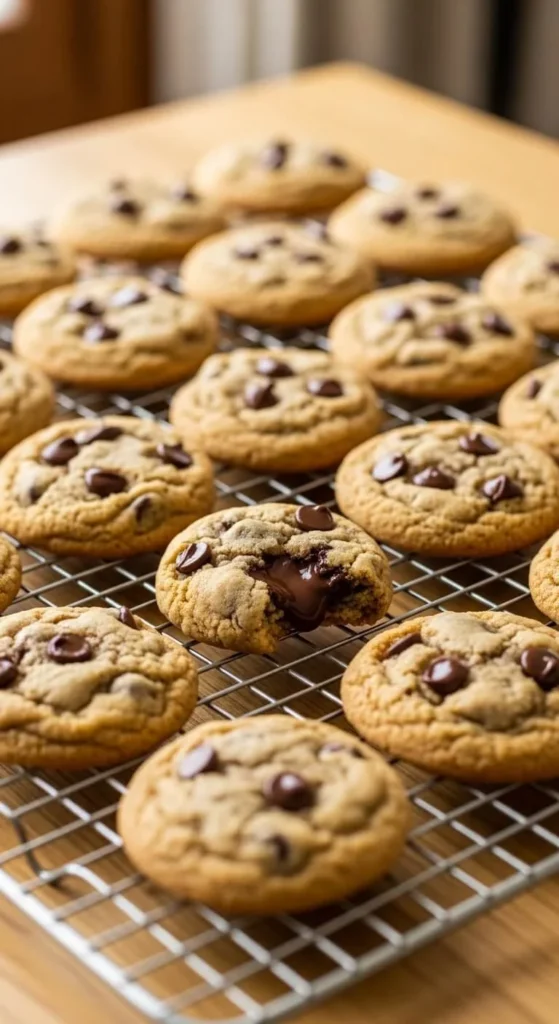
There’s something magical about breaking open a warm chocolate chip cookie and watching that soft, gooey center slowly melt into your hands. The edges are lightly crisp, the middle is rich and tender, and every bite tastes like it came straight from a cozy neighborhood bakery.
The good news? You don’t need a professional oven or secret equipment to recreate that texture at home. You just need the right technique.
Let’s bake cookies that look impressive, taste incredible, and have that dreamy center everyone loves.
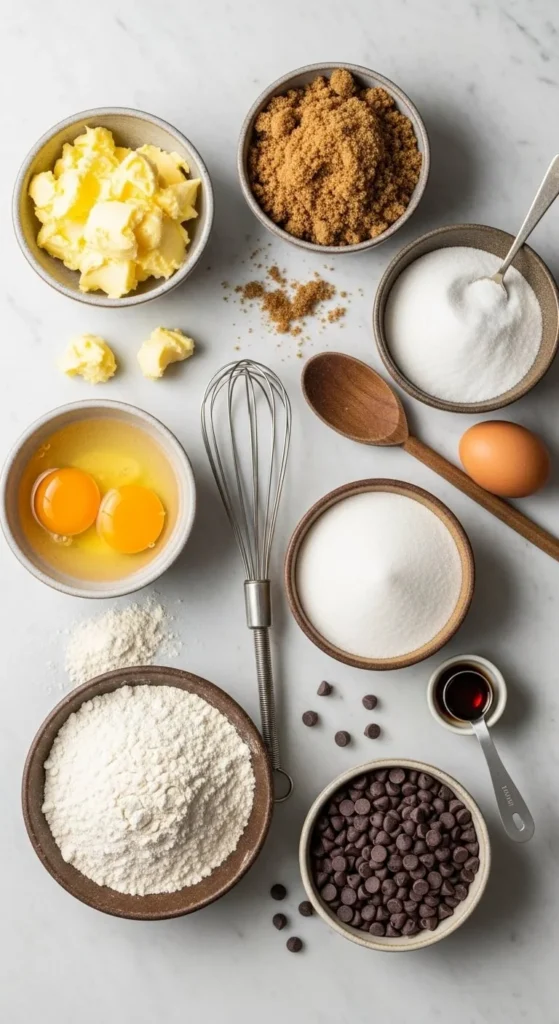
Choose the Right Ingredients (It Truly Matters)
Bakery-style cookies start with quality ingredients and the correct balance of fat, sugar, and flour.
Here’s what you’ll need:
- Unsalted butter (softened, not melted)
- Brown sugar (for moisture and chewiness)
- Granulated sugar (for lightly crisp edges)
- Eggs (room temperature)
- Vanilla extract
- All-purpose flour
- Cornstarch (secret to softness!)
- Baking soda
- Salt
- High-quality chocolate chips or chunks
Why this combination works:
- Brown sugar adds moisture → gooey center.
- Cornstarch creates tenderness.
- A mix of chocolate chips and chunks gives puddles of melted chocolate.
Step 1: Cream Butter and Sugar the Right Way
This step determines texture.
- Beat softened butter with brown and white sugar for 2–3 minutes.
- The mixture should become light and fluffy.
- Don’t rush this step — air equals softness.
Avoid melted butter if you want thick cookies. Melted butter spreads too much and can ruin that gooey center.
Step 2: Add Eggs and Flavor
Add eggs one at a time and mix gently. Stir in vanilla extract for that classic bakery aroma.
Tip:
Overmixing after adding eggs can make cookies dense. Mix just until combined.
Step 3: Mix Dry Ingredients Separately
In another bowl, whisk together:
- Flour
- Cornstarch
- Baking soda
- Salt
Then slowly fold dry ingredients into the wet mixture.
Important:
Stop mixing when you no longer see streaks of flour. Overmixing develops gluten, which makes cookies tough instead of soft.
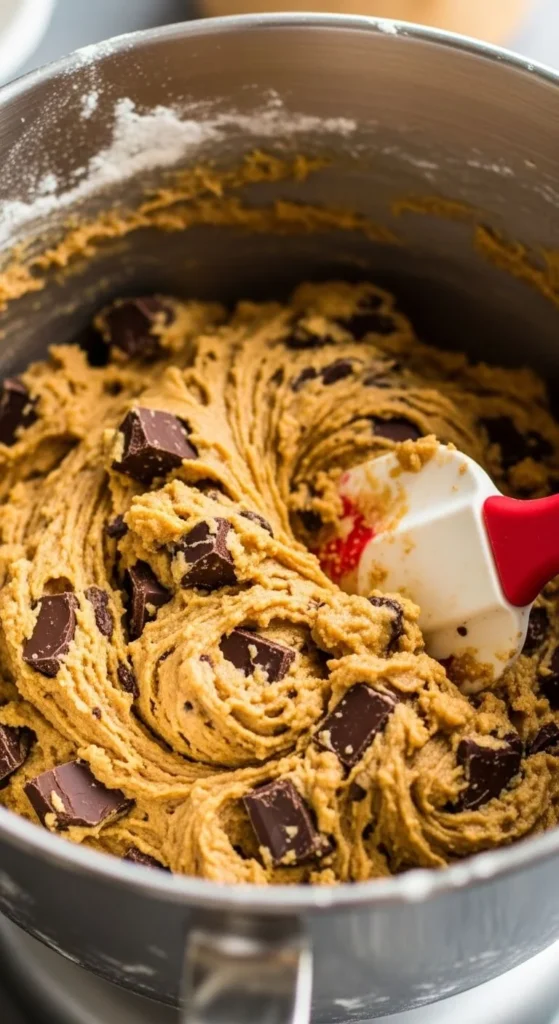
Step 4: Fold in the Chocolate Generously
This is where bakery magic happens.
Use:
- A mix of chocolate chips and larger chocolate chunks.
- Slightly more chocolate than you think you need.
Pro Tip:
Press a few extra chocolate chips on top of each dough ball before baking. This gives that professional, photo-ready look.
Step 5: Chill the Dough (Don’t Skip This!)
If you want thick cookies with a gooey center, chilling is non-negotiable.
- Chill for at least 1 hour (overnight is even better).
- Cold dough spreads less.
- It deepens the flavor.
This single step separates average cookies from bakery-level cookies.
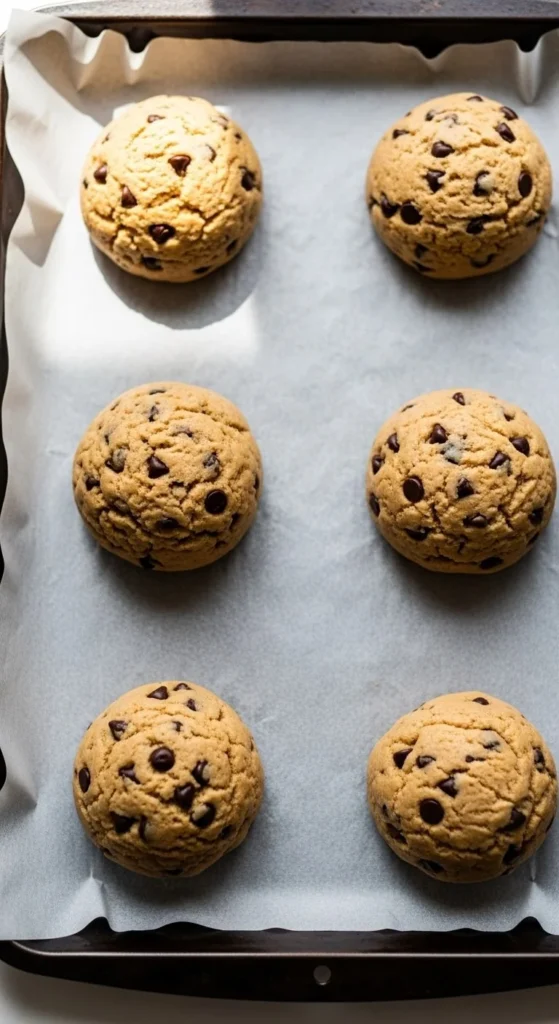
Step 6: Shape for Thickness
For that classic thick, bakery appearance:
- Scoop large portions (about 3 tablespoons each).
- Roll into tall balls rather than flat discs.
- Keep them slightly higher in the center.
This helps create a soft middle and golden edges.
Step 7: Bake at the Perfect Time
Preheat your oven to 175–180°C (350°F).
Bake for:
- 10–12 minutes
Here’s the secret:
Take them out when:
- The edges are golden.
- The center still looks slightly underbaked.
They will continue cooking on the hot tray after you remove them.
This is how you lock in that gooey center.
Step 8: The Cooling Trick
Let cookies rest on the tray for 5–10 minutes before transferring.
This:
- Sets the structure.
- Keeps the middle soft.
- Prevents breaking.
If you love extra gooey cookies, enjoy one while it’s still slightly warm.
Extra Tips for Bakery-Level Results
Want next-level results? Try these:
- Use room temperature ingredients.
- Slightly underbake every time.
- Use parchment paper for even baking.
- Sprinkle a tiny pinch of sea salt on top before baking for flavor contrast.
- Use good-quality chocolate — it truly makes a difference.
Common Mistakes to Avoid
Even small mistakes can change texture.
Avoid:
- Overmixing dough
- Skipping chilling time
- Overbaking
- Using too little brown sugar
- Flattening dough before baking
Remember: thick dough + short bake time = gooey center.
How to Store for Maximum Freshness
To keep them soft:
- Store in an airtight container.
- Add a small piece of bread inside — it keeps cookies moist.
- Reheat for 8–10 seconds in the microwave for that fresh-baked feel.
They’ll stay delicious for up to 4 days (if they last that long!).
Final Thoughts
Bakery-style chocolate chip cookies aren’t about fancy tools — they’re about technique. Cream properly. Chill patiently. Bake just until the edges turn golden. And most importantly, don’t be afraid of a slightly soft center.
That gooey middle is the whole point.
Once you try this method, regular cookies won’t compare.
Save this recipe for later, pin it to your baking board, and treat yourself to cookies that look as good as they taste. 🍪
Leave a Reply