There’s something magical about tiny desserts layered beautifully inside clear jars. They look luxurious, feel special, and photograph like a dream. Whether you’re prepping for a gathering, creating content, or just treating yourself, chocolate dessert jars are the ultimate Pinterest-worthy indulgence.
The best part? They’re surprisingly easy to make — no complicated techniques required.
Let’s build stunning chocolate dessert jars step-by-step.
Choose the Perfect Jar & Base
Before you even start mixing ingredients, think presentation.
Best jar options:
- Mini mason jars
- Small glass pudding cups
- Short wide-mouth jars
- Clear dessert glasses
Clear containers are key. They showcase those beautiful layers and instantly elevate the look.
Now, for the base layer, choose something rich and slightly crumbly:
- Crushed chocolate cake
- Brownie crumbs
- Chocolate biscuit crumbs
- Chocolate sponge cubes
The base should be moist but not soggy. Lightly press it into the bottom of each jar — don’t compact it too tightly.
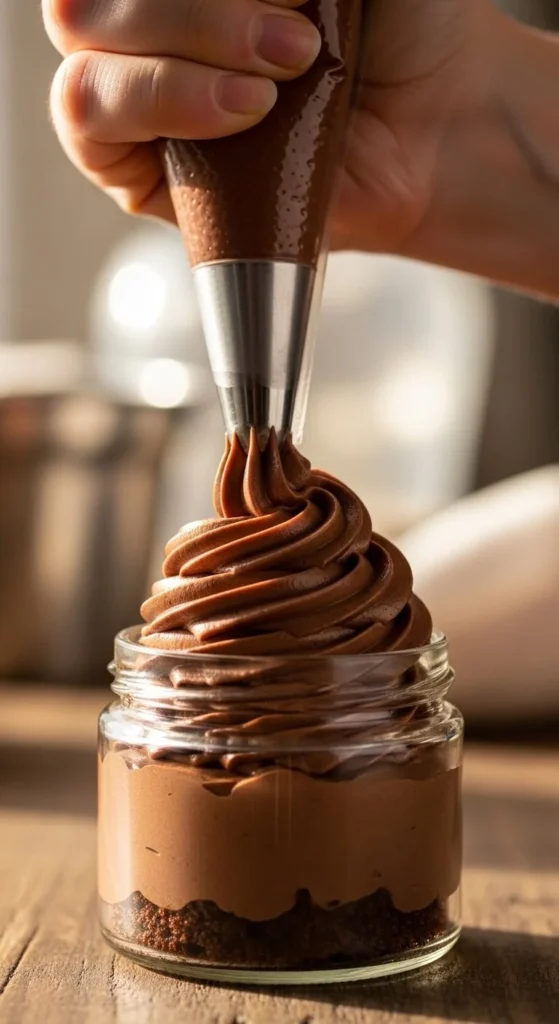
Make a Silky Chocolate Mousse Layer
This is where the magic happens. A creamy, smooth mousse creates that bakery-style finish.
Simple chocolate mousse ingredients:
- Melted dark chocolate
- Fresh cream
- Powdered sugar
- A splash of vanilla essence
Quick Method:
- Whip the cream until soft peaks form.
- Fold in melted (cooled) chocolate gently.
- Add powdered sugar and vanilla.
- Mix until smooth and airy.
The key? Fold gently. You want the mousse light and fluffy — not dense.
Pipe or spoon this over the cake layer. For cleaner presentation, use a piping bag.
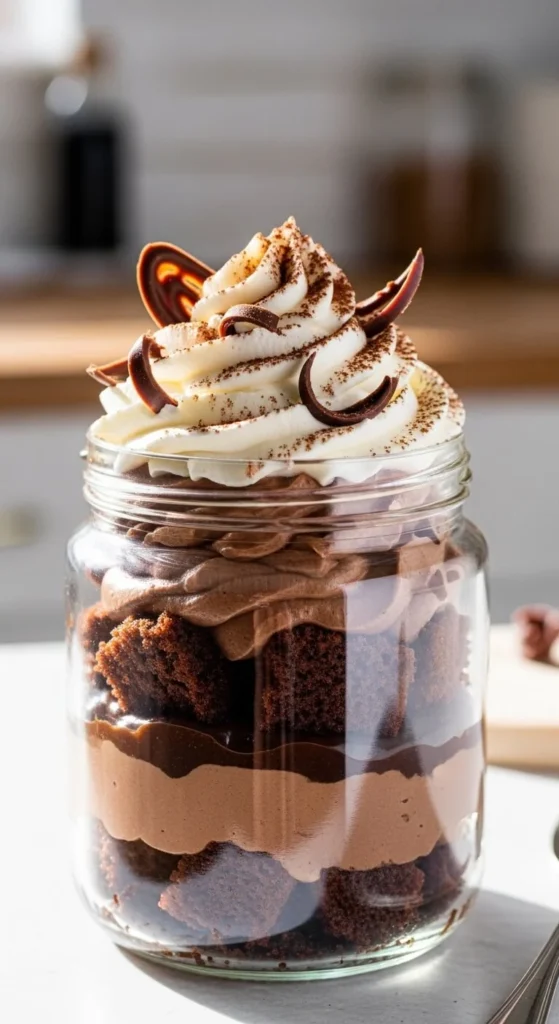
Add Texture for That Pinterest Wow-Factor
Layers are everything. To make your jars visually exciting and delicious, alternate textures.
Consider adding:
- Chocolate ganache
- Crushed nuts
- Cookie crumble
- Whipped cream
- Chocolate chips
For a glossy ganache:
- Heat cream
- Pour over chopped chocolate
- Let sit for 2 minutes
- Stir until smooth
Let it cool slightly before layering so it doesn’t melt the mousse underneath.
Alternate light and dark layers for contrast. A pale whipped cream layer between dark chocolate makes the jar pop beautifully in photos.
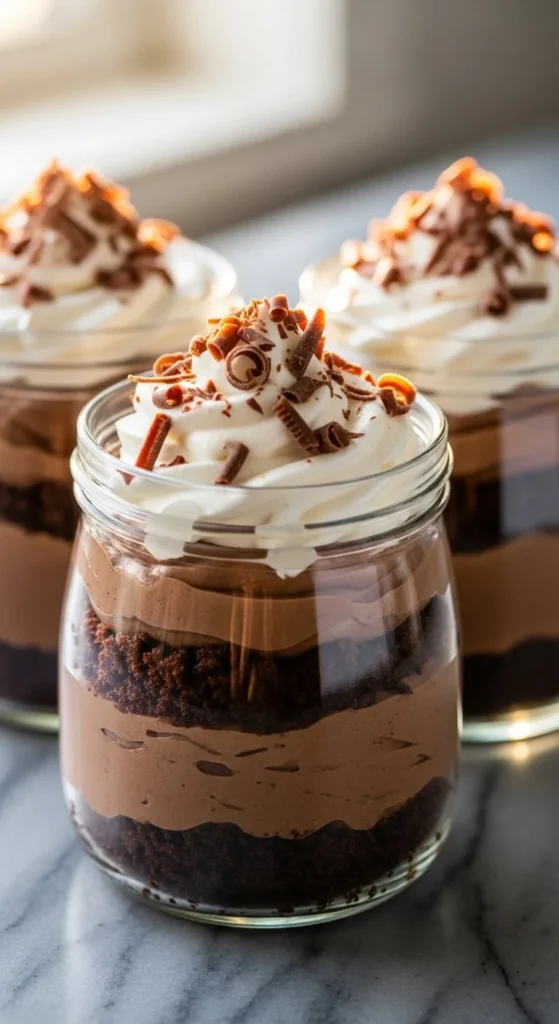
Create a Stunning Top Layer
The top layer is what people see first — so make it count.
Here are some aesthetic topping ideas:
- Chocolate curls
- Cocoa powder dusting
- Fresh berries
- Mini chocolate chunks
- Piped whipped cream swirls
Keep it balanced. Don’t overcrowd the top. Negative space makes desserts look elegant.
Chill for Perfect Layers
Refrigerate your jars for at least 1–2 hours.
This helps:
- Set the mousse
- Firm up the ganache
- Deepen chocolate flavor
- Keep layers clean and defined
Cold jars photograph better because the layers stay sharp and structured.
If you’re making them ahead, cover lightly with lids or plastic wrap.
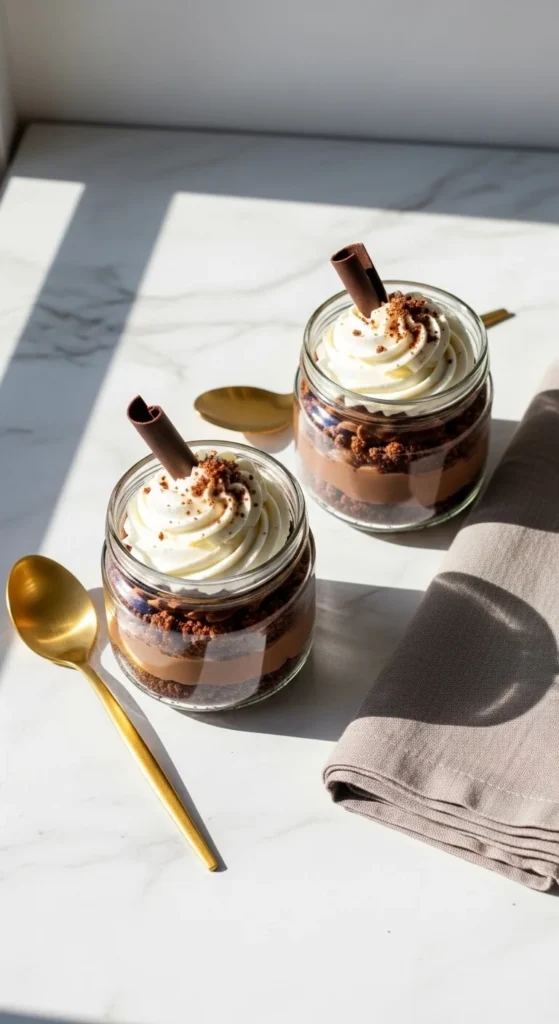
Styling Tips for Pinterest-Worthy Photos
Now let’s talk visuals — because aesthetic is everything.
Lighting
- Use natural window light
- Avoid harsh overhead lighting
- Shoot near a bright wall
Backgrounds
- Marble countertops
- White wooden boards
- Neutral fabric napkins
- Soft beige or pastel surfaces
Composition
- Shoot from slightly above (45-degree angle)
- Show layers clearly
- Add minimal props like a spoon or small bowl of chocolate chips
Flavor Variations to Try
Once you master the basic version, experiment!
- Chocolate & Strawberry: Add fresh strawberry slices between layers.
- Chocolate & Coffee: Mix a little instant coffee into the cake base.
- Chocolate & Peanut Butter: Add a thin peanut butter layer for contrast.
- Triple Chocolate: Combine dark, milk, and white chocolate layers.
Layer combinations make every jar unique and visually interesting.
Pro Tips for Perfect Dessert Jars
✔ Use a piping bag for clean layers
✔ Wipe jar edges before chilling
✔ Chill between layers if needed
✔ Don’t overfill — leave space at the top
✔ Use high-quality chocolate for rich flavor
Little details make a big difference in both taste and presentation.
Final Touch: Make Them Share-Worthy
Chocolate dessert jars are perfect for:
- Birthday tables
- Dinner parties
- Gifting
- Content creation
- Weekend treats
They’re elegant, customizable, and incredibly satisfying to assemble.
Once you see those clean layers through the glass, you’ll understand why they’re so popular on Pinterest.
Now it’s your turn — gather your jars, melt some chocolate, and start layering.
✨ Save this recipe for later and create your own Pinterest-perfect chocolate dessert jars!
Leave a Reply