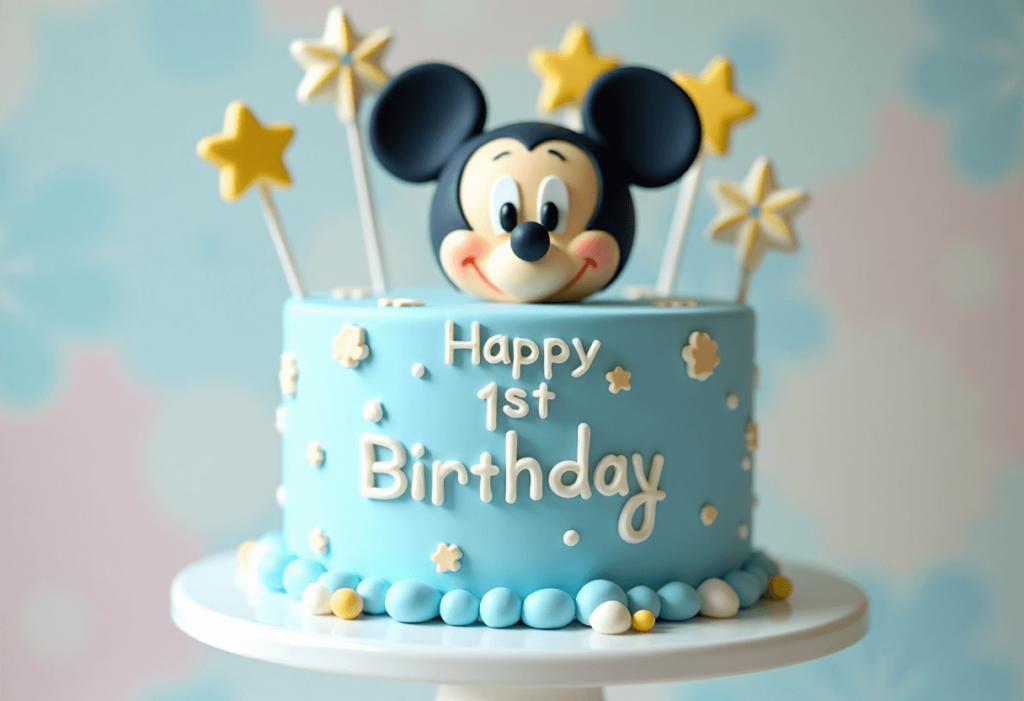
If you’re planning a Mickey Mouse-themed birthday or baby shower, this Baby Mickey Mouse Cake is the perfect centerpiece! Featuring soft, moist cake layers, fluffy frosting, and a cute baby Mickey design, this cake is just as delicious as it is adorable.
The best part? You don’t need to be a pro baker to make it! With simple steps and easy decorating tips, you’ll have a showstopping cake that will wow kids and adults alike. Let’s bring a little Disney magic to the dessert table! 🏰✨
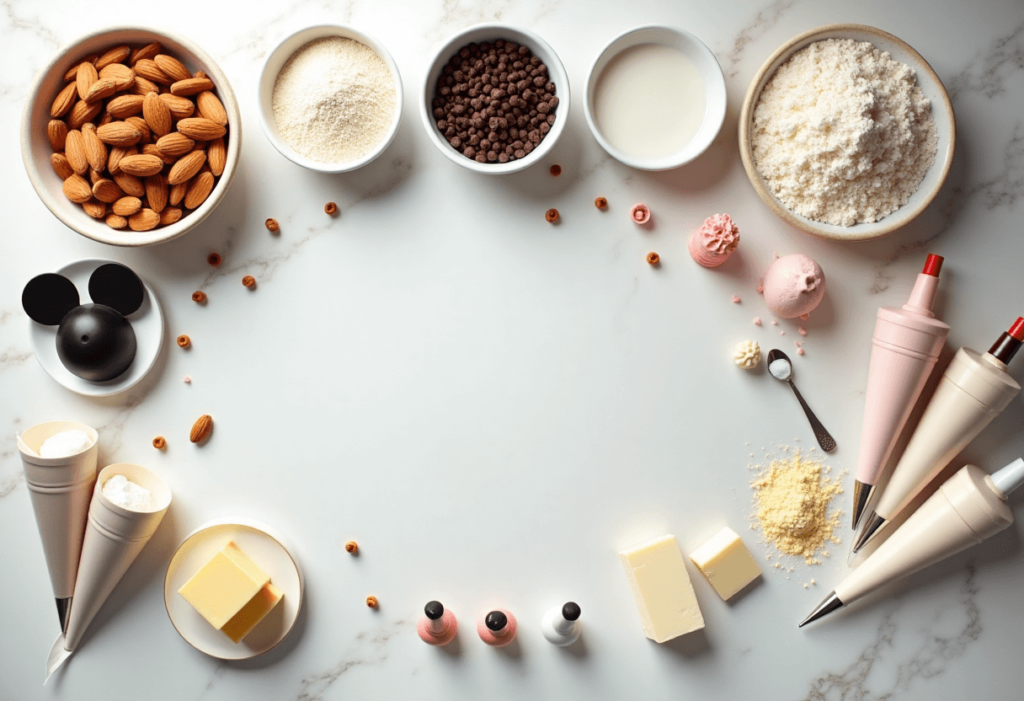
What You’ll Need
Cake Ingredients:
- 2 ½ cups all-purpose flour (or cake flour for a softer texture)
- 2 ½ teaspoons baking powder
- ½ teaspoon salt
- 1 cup unsalted butter, softened
- 1 ¾ cups granulated sugar
- 4 large eggs
- 1 tablespoon vanilla extract
- 1 cup whole milk
- ½ cup sour cream (for extra moisture)
Buttercream Frosting Ingredients:
- 1 ½ cups unsalted butter, softened
- 4 cups powdered sugar
- 3 tablespoons heavy cream or milk
- 2 teaspoons vanilla extract
- Blue food coloring (for Baby Mickey theme)
Decoration Supplies:
- Black fondant (for Mickey ears and facial features)
- White fondant (for eyes and small details)
- Yellow and white sprinkles (for added decoration)
- Piping bags & round tips
Pro Tips for the Best Baby Mickey Cake
- Use Cake Flour for Extra Softness – Cake flour gives a lighter texture compared to all-purpose flour.
- Room Temperature Ingredients – This ensures even mixing and a fluffier cake.
- Chill the Cake Before Decorating – A slightly chilled cake is easier to frost, preventing crumbs from mixing into the buttercream.
- Plan Your Mickey Design First – Sketch the face on parchment paper before cutting fondant for accuracy.
- Use Gel Food Coloring for the Best Color – It won’t alter the buttercream consistency like liquid food coloring does.
Tools You’ll Need
- Two 8-inch round cake pans
- Stand mixer or hand mixer
- Mixing bowls
- Spatula
- Piping bags & tips
- Cake turntable (optional, for smoother frosting)
- Offset spatula
- Fondant roller & cutters
Substitutions & Variations
- Dairy-Free? Use vegan butter and almond milk.
- Gluten-Free? Substitute with 1:1 gluten-free flour blend.
- Chocolate Version? Swap ½ cup flour for cocoa powder.
- Cupcake Version? This recipe makes 24 cupcakes—bake for 18-20 minutes.
Make-Ahead Tips
- Cake Layers: Bake in advance and store wrapped in plastic for up to 2 days or freeze for up to 2 months.
- Buttercream: Store in an airtight container in the fridge for up to 1 week. Bring to room temp and re-whip before using.
- Fondant Decorations: Cut them a day ahead and store in an airtight container.
How to Make the Baby Mickey Mouse Cake
1. Prepare & Bake the Cake Layers
Preheat oven to 350°F (175°C). Grease and line two 8-inch round cake pans with parchment paper. In a bowl, whisk flour, baking powder, and salt. In a separate bowl, beat butter and sugar until fluffy, then add eggs, vanilla, milk, and sour cream. Gradually mix in dry ingredients until just combined. Divide batter evenly between pans and bake for 28-30 minutes.

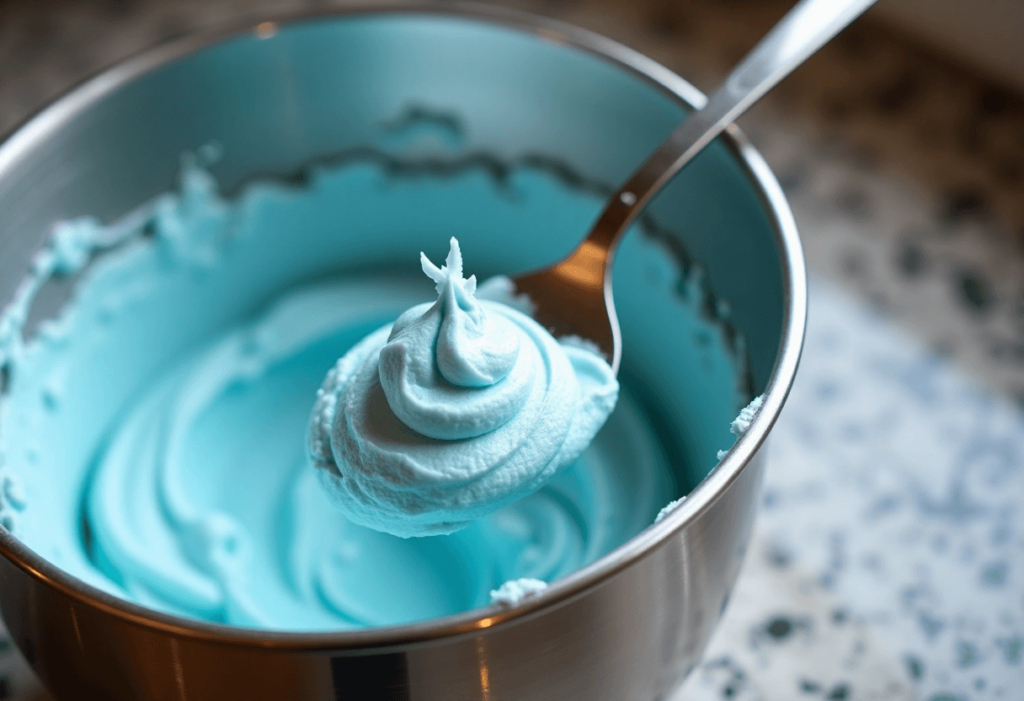
2. Make the Buttercream Frosting
Beat butter until creamy, then gradually add powdered sugar, vanilla, and heavy cream. Beat until smooth and fluffy. Add blue food coloring for a soft pastel baby blue shade.
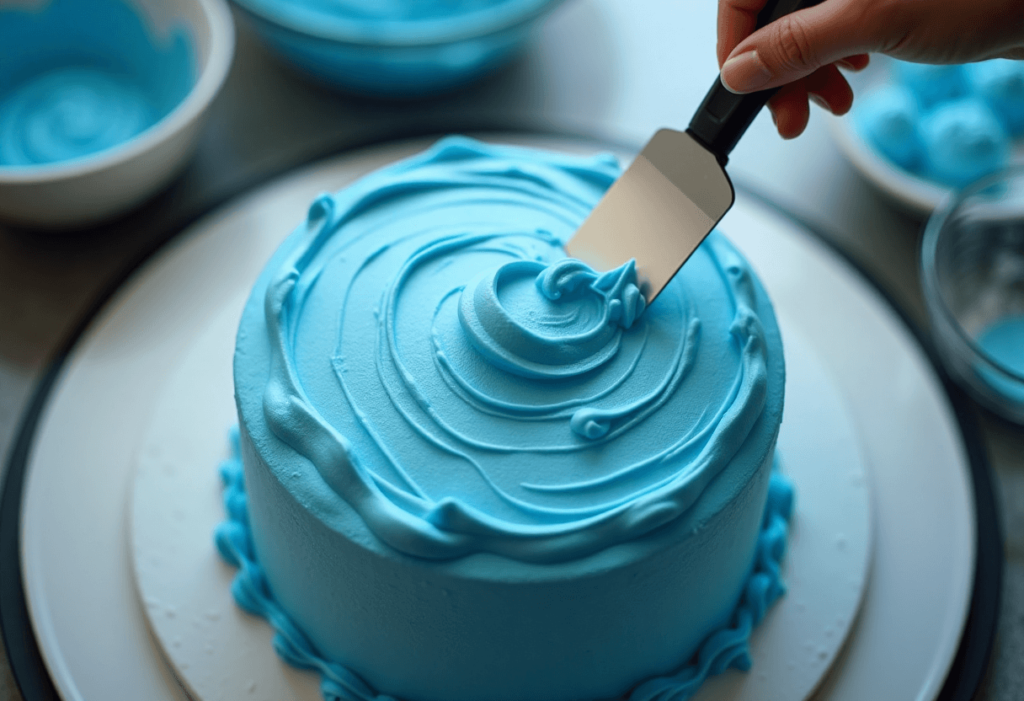
3. Frost the Cake
Place one cake layer on a turntable or serving plate. Spread an even layer of buttercream, then place the second cake layer on top. Apply a thin crumb coat and chill for 15 minutes, then frost the entire cake smoothly.
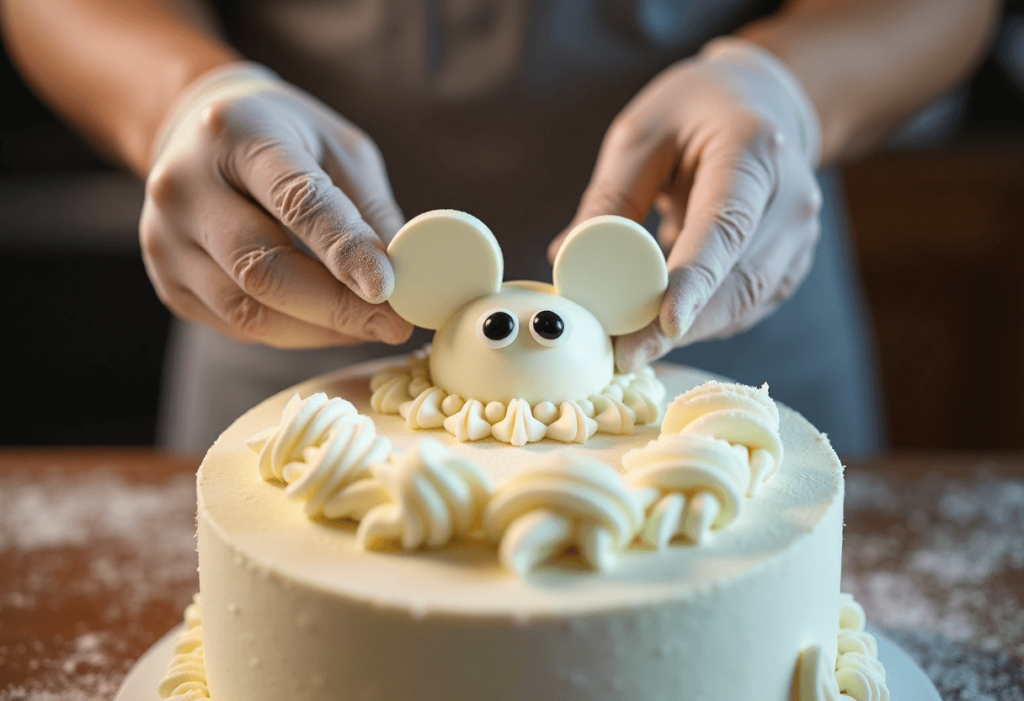
4. Create the Baby Mickey Face
Roll out black fondant and cut out two circles for ears. Use white fondant for Mickey’s eyes and face details. Carefully place them on the cake.
5. Add Finishing Touches
Pipe white frosting stars around the cake, sprinkle yellow stars, and write a message like “Happy 1st Birthday!”

Storage & Leftovers
- Fridge: Store covered for up to 3 days.
- Freezer: Wrap slices individually and freeze for up to 2 months.
Enjoy & Share!
This Baby Mickey Mouse Cake is adorable, delicious, and easier than it looks! Whether it’s for a first birthday, baby shower, or Disney-themed party, it’s sure to bring smiles. If you make this cake, let me know in the comments how it turned out! 🎂🐭✨
Leave a Reply