Scrolling through Pinterest and suddenly stopping because a dreamy, layered dessert in a clear cup looks too pretty to ignore? That’s the power of aesthetic dessert cups. They’re colorful, perfectly layered, and almost too beautiful to eat — almost.
The best part? You don’t need professional training to make them. With a few simple ingredients, clear cups, and a little creativity, you can create scroll-stopping treats right at home.
Let’s break down exactly how to make dessert cups that look Pinterest-perfect and taste just as amazing.
Why Dessert Cups Go Viral
Before we jump into the recipe, let’s understand why these treats perform so well online:
- Visible layers = instant visual appeal
- Individual portions = perfect for parties
- Bright colors & textures = eye-catching photos
- Minimal effort, maximum elegance
Clear cups turn simple ingredients into a visual masterpiece. The key is contrast — light and dark, creamy and crunchy, smooth and textured.
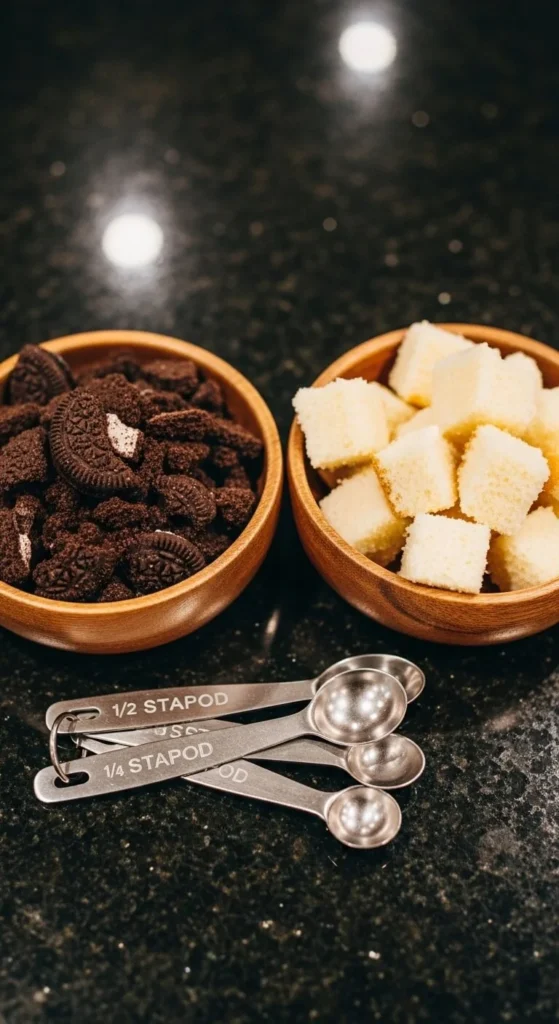
Step 1: Choose the Perfect Base
Your base layer sets the foundation. It adds structure and contrast to creamy layers.
Popular options:
- Crushed chocolate cookies
- Vanilla sponge cake cubes
- Brownie crumbs
- Graham cracker crumbs
- Crushed digestive biscuits
Make sure your base isn’t too thick — about 1–2 tablespoons per cup is ideal.
Pro Tip: Press the base down gently with the back of a spoon to create a clean, defined layer.
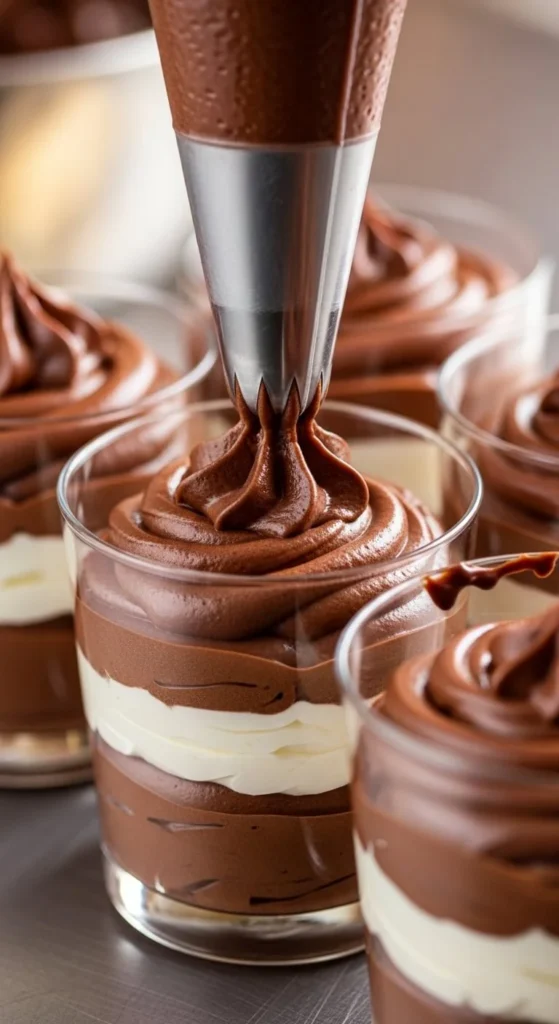
Step 2: Add a Creamy Filling
This is where the magic happens. Your creamy layer should be smooth, pipeable, and stable.
Easy no-bake filling ideas:
- Chocolate mousse
- Vanilla whipped cream with cream cheese
- Strawberry cream
- Mango mousse
- Custard layered with whipped cream
To make a simple chocolate mousse:
- 1 cup whipped cream
- ½ cup melted chocolate (cooled)
- 2 tablespoons powdered sugar
Fold gently until smooth and airy.
Pipe the filling using a piping bag (or zip-top bag with the corner cut off) for neat, bakery-style layers.
Step 3: Add Color & Texture
Pinterest-worthy desserts always have contrast. This is where you elevate your cups from basic to beautiful.
Add:
- Fresh strawberries
- Blueberries
- Mango cubes
- Chocolate chips
- Caramel drizzle
- Crushed nuts
- Cookie crumbles
Layer strategically:
- Dark base
- Light cream
- Bright fruit
- Another cream layer
Keep layers thin and visible for that aesthetic striped look.
Step 4: Focus on Presentation
Presentation is everything. Even simple ingredients look premium when styled correctly.
Use:
- Clear plastic or glass cups
- Mini mason jars
- Small trifle bowls
- Tall shot glasses for party portions
Make sure:
- The inside of the cup stays clean
- Layers are even
- Toppings are centered
Top ideas for the final layer:
- A swirl of whipped cream
- A single fresh berry
- Chocolate shavings
- A small cookie piece
Step 5: Flavor Combinations That Always Work
If you want guaranteed Pinterest success, try these combinations:
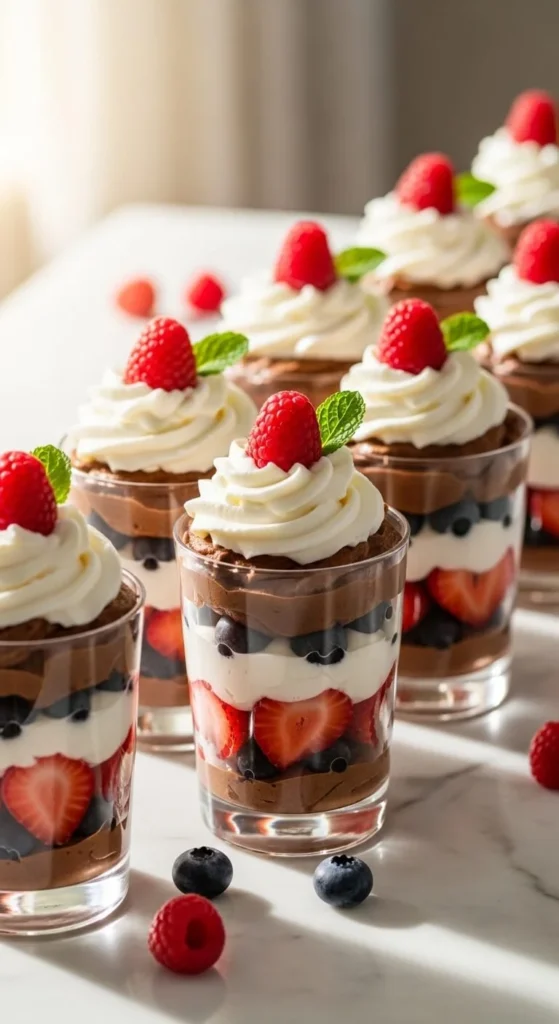
Chocolate Strawberry Cup
- Chocolate cookie base
- Chocolate mousse
- Sliced strawberries
- Whipped cream topping
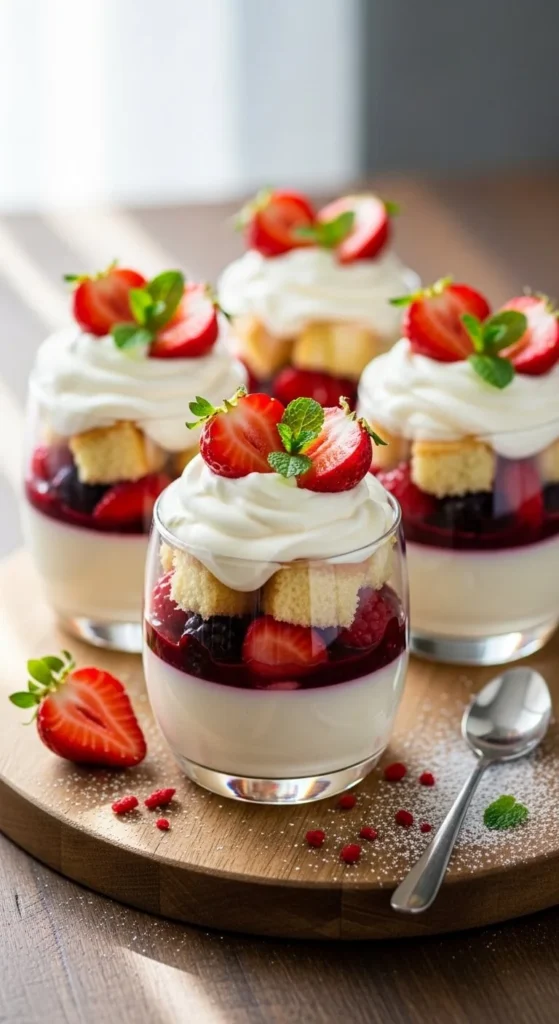
Mango Cream Dream
- Vanilla cake cubes
- Mango puree
- Cream filling
- Fresh mango cubes
Cookies & Cream Cup
- Crushed chocolate sandwich cookies
- Vanilla cream
- Cookie crumbs
- Chocolate drizzle
Keep flavors familiar but visually layered. That’s the sweet spot between trendy and crowd-pleasing.
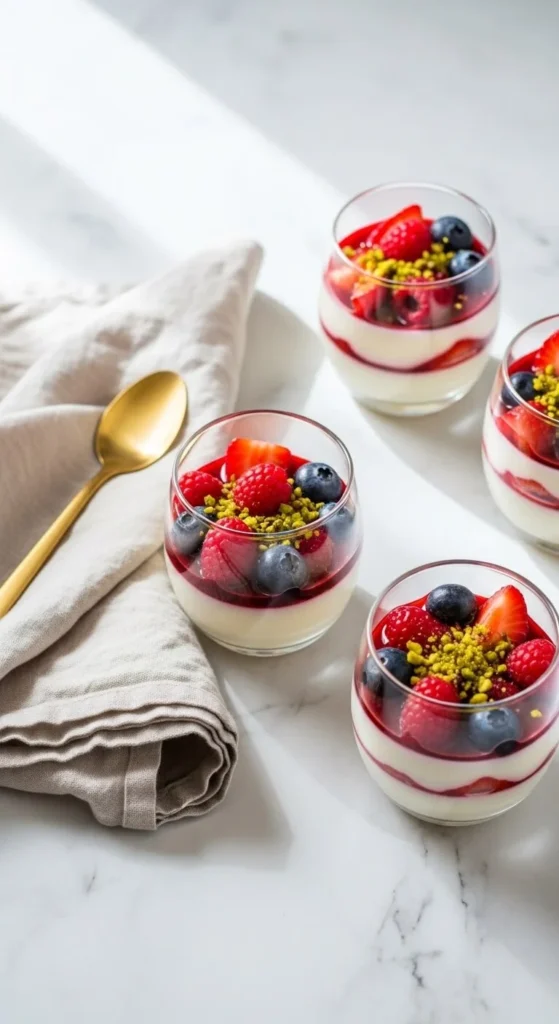
Step 6: Styling for the Perfect Photo
You’ve made the dessert — now let’s make it viral.
Photography tips:
- Use natural light near a window
- Keep backgrounds neutral (white, beige, marble)
- Add soft props: linen napkins, wooden spoons
- Shoot from slightly above or straight-on to show layers
Avoid clutter. Let the dessert be the hero.
Common Mistakes to Avoid
Even simple desserts can go wrong. Here’s what to watch for:
- ❌ Overfilling layers
- ❌ Mixing layers accidentally
- ❌ Using overly runny cream
- ❌ Skipping chilling time
Chill your cups for at least 30–60 minutes before serving. This helps layers set and flavors blend beautifully.
Make Them Ahead for Parties
Dessert cups are perfect for:
- Birthdays
- Family gatherings
- Eid celebrations
- Bridal showers
- Afternoon tea
You can prepare them a day ahead and store them in the refrigerator. Just add fresh fruit toppings before serving to keep them vibrant.
Final Thoughts
Aesthetic dessert cups aren’t complicated — they’re strategic. Think layers, contrast, and clean presentation. With just a handful of ingredients and a little attention to detail, you can create desserts that look straight out of a Pinterest board.
The best part? They taste as good as they look.
Now it’s your turn. Pick your favorite flavor combo, grab some clear cups, and start layering.
Save this recipe for later — your next viral dessert is waiting. 🍓✨
Leave a Reply